New
Contents:
1. New integration – Maven repository
2. Menus by Day Parts
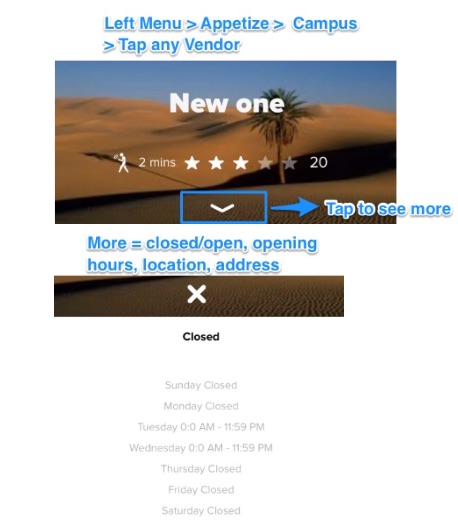
3. Open Directly Menu
4. Pickup Time Selection
5. Dynamic Wait Time
6. Quick re-order
1. New integration process based on Maven repository
- speeding up the build time
- easier integration process (no copy-pasting directories)
- easier build process (on both sides)
- access control (using private repository) – read technical documentation
2. Menus by Day Parts
- the feature allows to create different menus at different time
- depending on your settings, various items show up in the menu at different hour
- for example – you want to have new menus: breakfast menu that is available from 7am to 10:30am and lunch menu available from 11:00am to 1:00pm
- In Connect, you decide which items will be sold as breakfast and which as lunch items by creating “Day Part” and assigning certain items to that time range
Steps in Connect:
example: I want my item – “ApplePie” to be sold only at breakfast between 9:00 – 11:00am.
STEP 1. Open Connect > Options > Day Parts and click the blue CREATE button -> “Add Day Part” page opens
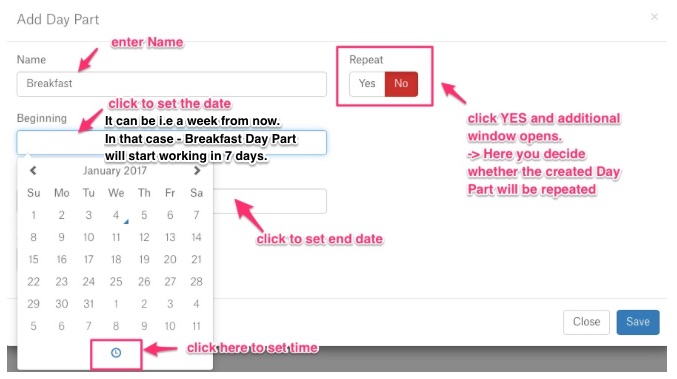
STEP 2. Choose Day Part Repetition using “Repeat Button”
 and as a result – how my sample configuration looks like:

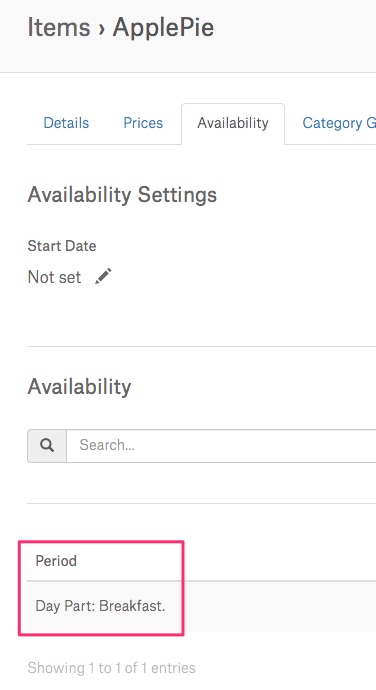
STEP 3. Add Day Parts to Items
-> don’t forget to assign selected item(s) to Day Parts so as they are shown at the defined time
-> Go to: Items > (choose the item you want) > Availability > Create > Availability opens > Choose “Day Part” and pick the previously created set (here that’ll be “Breakfast”).
Note! Items > Availability page has some additional settings:
“Start Date”
“End Date”
“Always Available”
If those fields (Start,End,Always…) are filled in, Day Parts will be ignored.
Start Date & End Date have priority over Always Available.

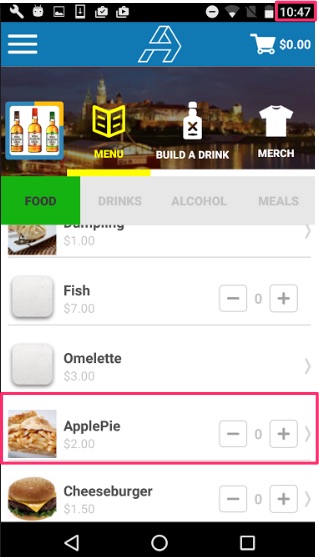
After completing steps 1-3 see the result in the app:
(remember that my breakfast menu is set from 9am – 11am)
1. “Breakfast” DayPart is over – no ApplePie for sale
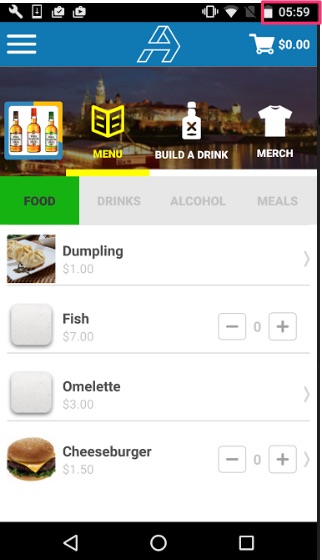
2. “Breakfast” DayPart is active – ApplePie is for sale
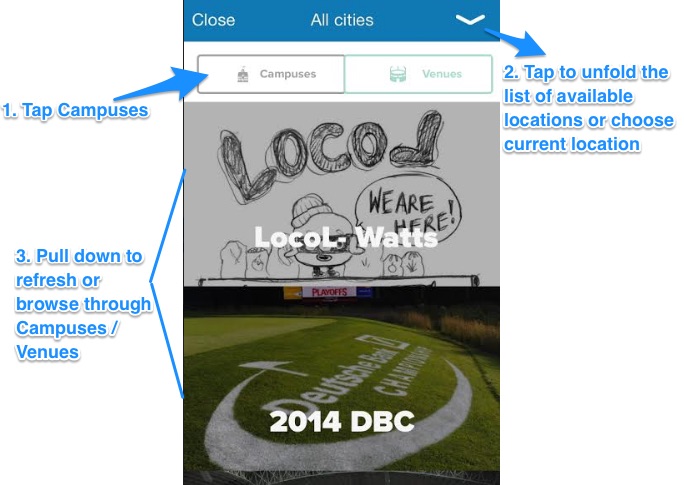
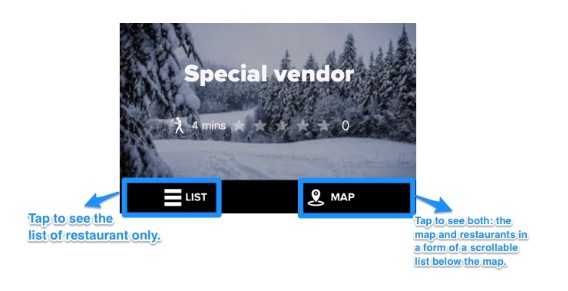
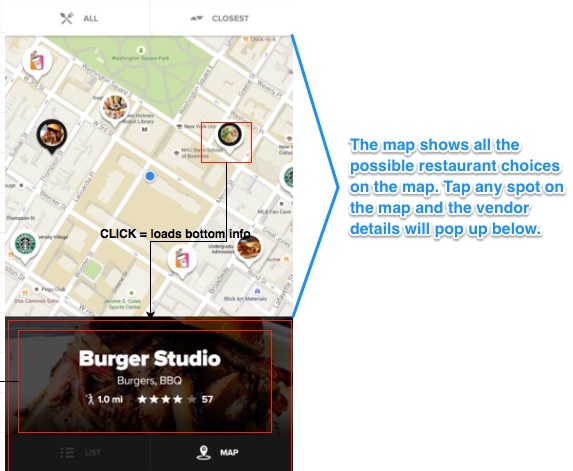
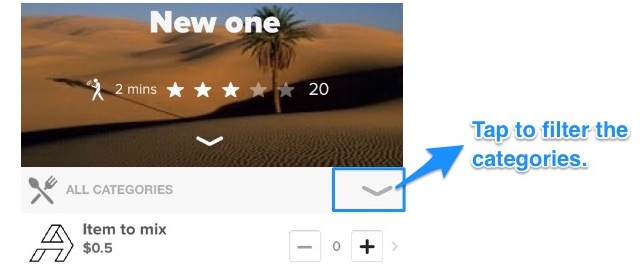
3. Open Directly Menu
The feature changes UI in the following way:
- open SDK -> what you see immediately after opening the app is menu of the chosen restaurant
- Venues and Vendors view is blockedTo set the menu of a restaurant as the first thing user sees, you need to use Color Configurator (Connect):STEP 1. Open Color Configurator here: https://connect.stg.appetizeapp.com/sdkconf/templates/1/api_key/a4fa69c1-1af9-11e2-8bc7-b870f40c5a58STEP 2. Go to Venue Identifier
 STEP 3. The below section – Vendor Identifier show a list of available Vendors. Choose one of them
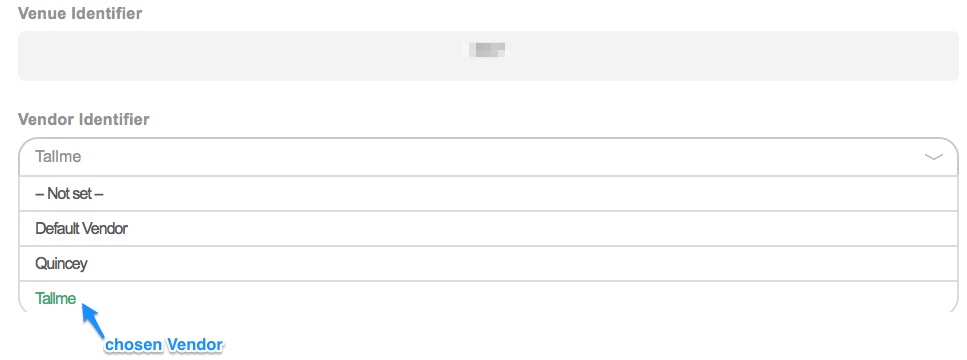
STEP 4. Scroll to the bottom of the list and confirm with SUBMIT button.
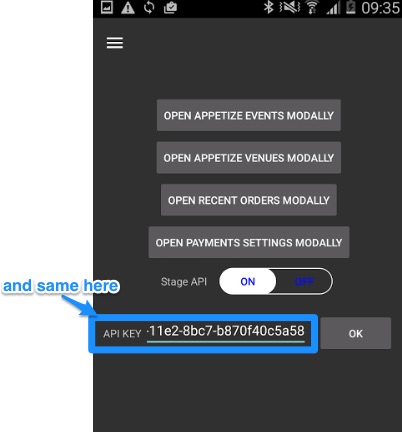
STEP 5. Open the app (remember to use the same API key)

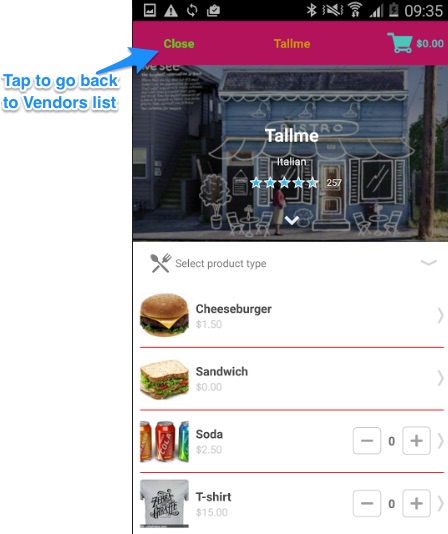
 Result: The first thing you see after opening the app is the menu of the chosen Vendor – here that’s “Tallme”
4. Pickup Time Selection
- it offers the ability to order food for later on the current day
- for instance, a client wants to place a lunch order and pickup the food at 11:30 am (and he can do it earlier, i.e., at 10am)
- this is just placing orders for a short-term completion like 60 minutes. It’s not for the next day/week
How to configure Pickup Time Selection:
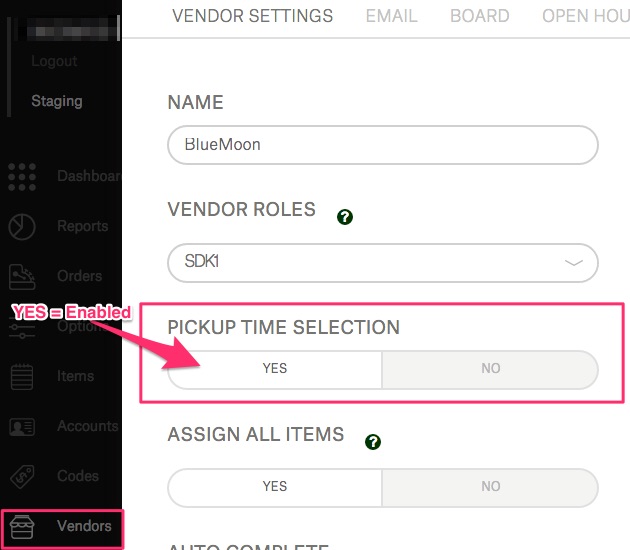
STEP1: Pickup Time Selection flag in Connect needs to be enabled.
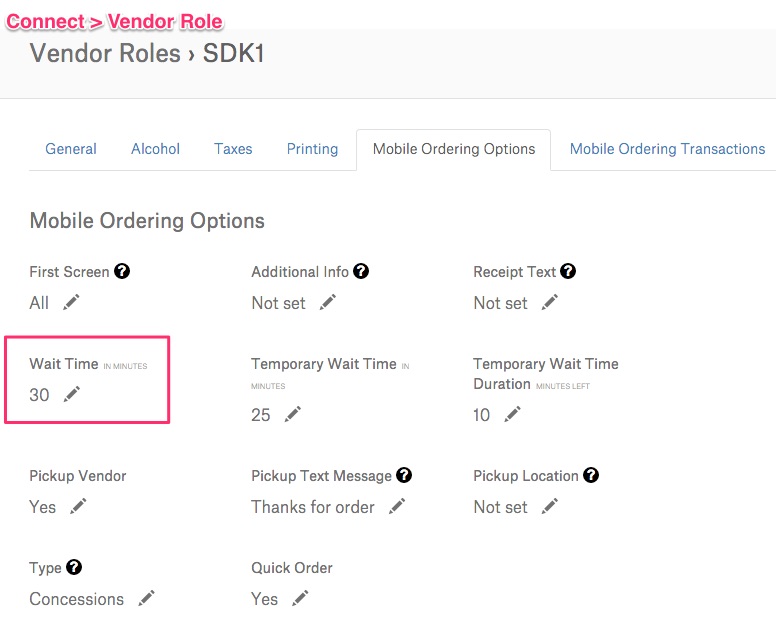
STEP 2. Then, Wait Time on Vendor Role needs to be defined.
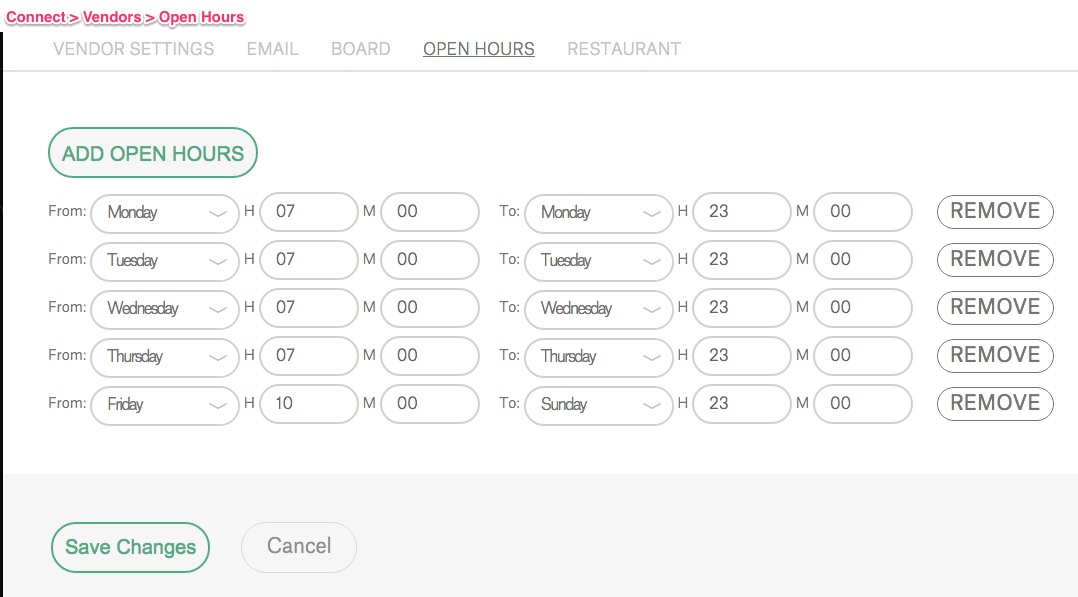
STEP 3. Vendor Open Hours – needs to be set (! required only when Venue is Campus)
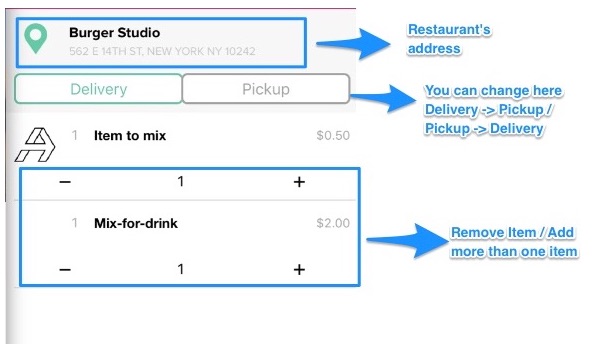
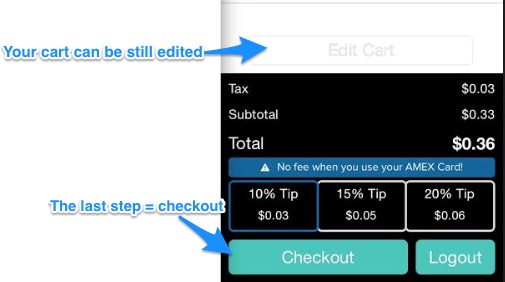
Result in the app:
The special button will be displayed in the cart next to “Edit Cart”. It’s called “Pickup time” and may display: “None” or the selected pickup time.

If it shows “None” -> 2 possibilities:
a) no pickup time chosen
b) ASAP pickup time chosen
How Pickup Time is counted?
Pickup Time is calculated using two parameters (open_hours) *for Campus Venues only and (wait_time) in this way:
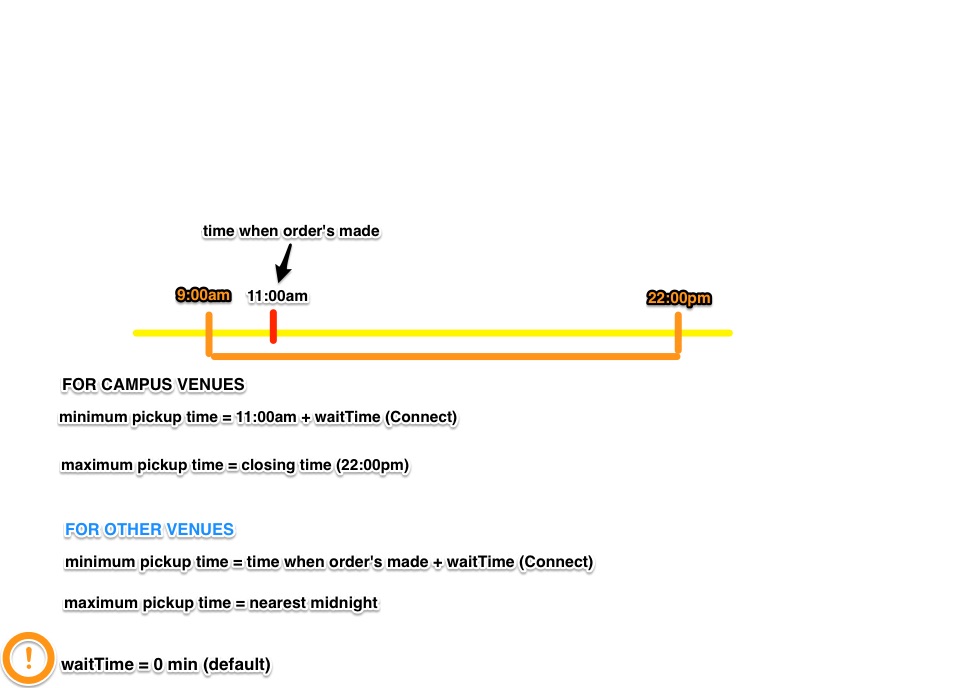
So, in case when user selects pickup time that is outside the range of open hours + wait time value = the “ OK” button will be blocked from UI.
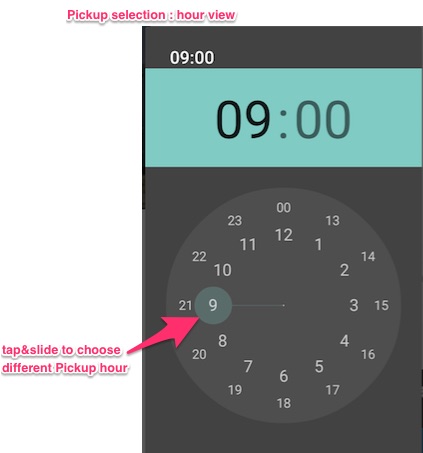
And see how it looks in the app:
-> add some items to the cart
-> when you want to choose different pickup time, tap “Pickup time” button
-> choose ASAP when you want your pickup time to be immediate
(result: button shows “None” time)
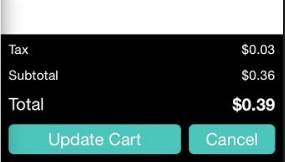
-> use the time picker and select hour and then minute(s)
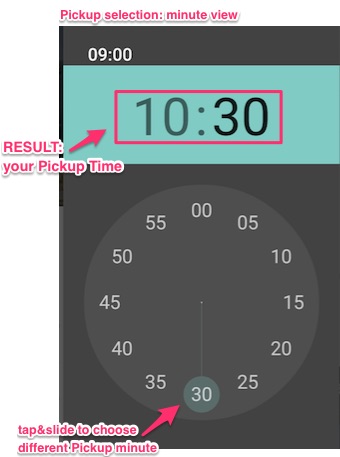
-> Confirm with “OK” button and see the result displayed in Pickup time button view
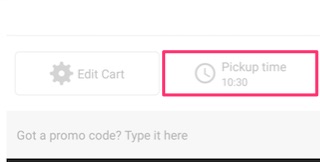
to edit “Pickup time” just tap the button again.
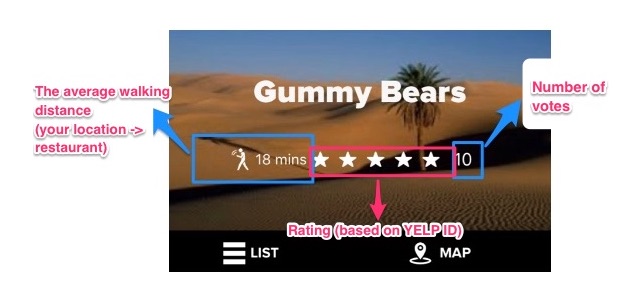
5. Dynamic Wait Time
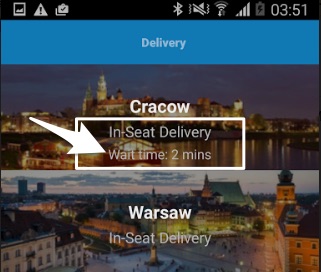
- the feature changes the expected Wait Time displayed for a Vendor
- since the feature is not based on push notifications, the Wait Time will changes only when you manually refresh Vendors view
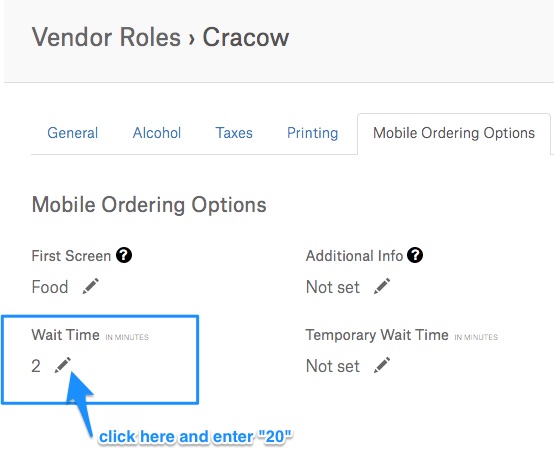
How to change Wait Time?
I want to change my WaitTime from 2min to 20min.
 STEP1: Go to Connect > Options > Vendor Role and click the correct VRole
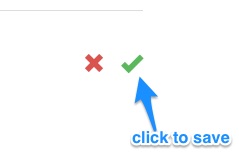
 STEP2: Save the action. Click the “pencil” in top-right corner. It’ll show 2 actions
RESULT:

6. Quick re-order
- the feature allows to order same items as in the past order
- order that you want to repeat needs to be finalized, so it is not possible to use quick re-order from Current Orders view in the app
- in case when some items are not available, the price has changed etc…Connect checks all of that and sends info back to SDK
- quick re-order can be accessed only from Past Orders menu
- you can even re-order items that were refundedQuick Order in simple steps:
STEP 1: Open the app and go to Past Orders
-> browse through the orders till you see the one you want to order again
STEP 2: Click the order you want to repeat
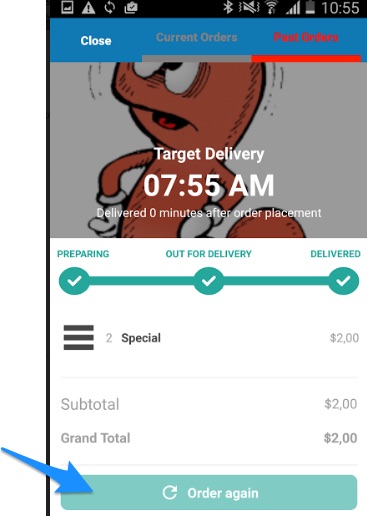
STEP3: Click “Order again” button
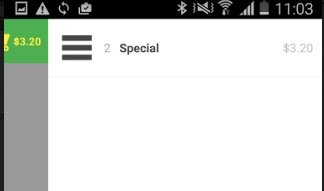
RESULT: You’re redirected to the cart view. Same items’re added

Note!
1. If the price of an item changes, there will be no alert shown. The changed price of an item will be visible in the cart.
2. If some items were removed, you’ll see the alert message.