New
Shiftplanning
GENERAL
-> That’s a feature that allows to track users’ work time using external service called Shift planner
CONFIGURATION STEPS (CONNECT)
-> It’s necessary to configure the account properly on Connect. Only then it will be possible to use it on Activate
STEP1: Set up Shiftplanning account for your Venue. For detailed info refer to
http://appdate.vipserv.org/appetizedoc/2015/08/28/shiftplanning/
STEP2: Set Permissions. Go to Main Menu>Options>Permission Sets>Menu.
Timeclock needs to be set to YES. It enables Time Management in Activate.
Note!! For Venues that do not use Timeclock, it’s important to set the Timeclock to “No”. Otherwise, some errors and problems with logging in might occur on Activate.
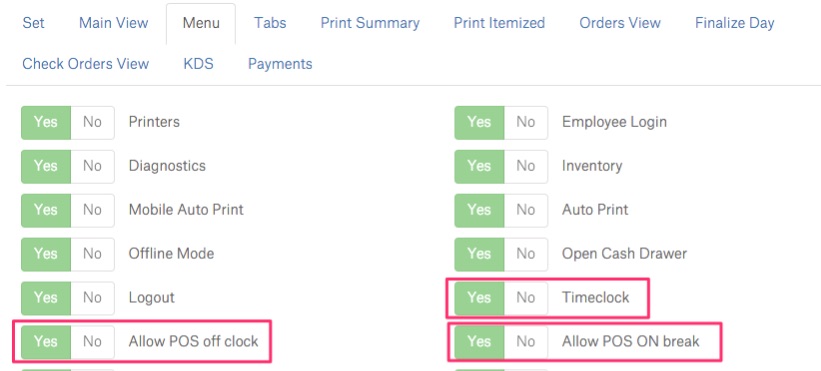 The other two permissions, do not need to be enabled for the correct Timeclock functioning, but may also change important settings:
- Allow POS off clock – enables the employee to log into the Activate account without Clocking In
- Allow POS ON break – enables the employee to log into the Activate account while on Break is switched on
STEP3: Each employee that will be using Timeclock needs to have the account configured properly.
Go to Connect>Main Menu>Accounts and select account for setup.
Following fields are required:
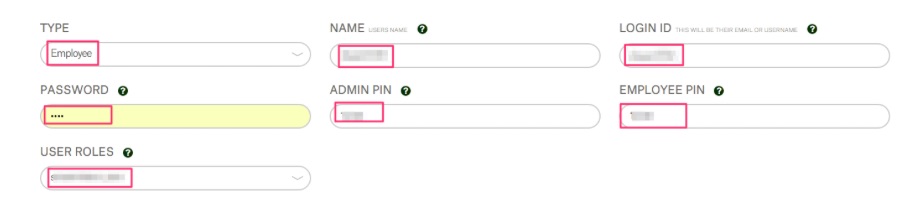
At least one vendor must be assigned to the created account.

In the Contact Information Tab following fields are required: First Name, Last Name, Email, Cell Phone & Home Phone, Wage, Job Title.
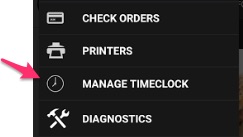
As a result,  page on Connect may be used by a given Employee and MANAGE TIMECLOCK tab appears in Activate left menu
ACTIVATE FEATURES
In this section, you can read on Shiftplanning user actions and see the new features in real-life scenarios.
LIST OF FEATURES:
1. Clock in / Clock out
2. Breaks
3. Changing position at Clocking or during shift
4. Enter Tips on Clock Out
5. Require Clock In before using POS
1. CLOCK IN / CLOCK OUT
-> Allows employees to track their work time
-> Clock in = start work
-> Clock out = finish your shift
ACTIVATE’S BEHAVIOR:
-> tap to open Activate’s left menu
-> tap “Manage Timeclock”
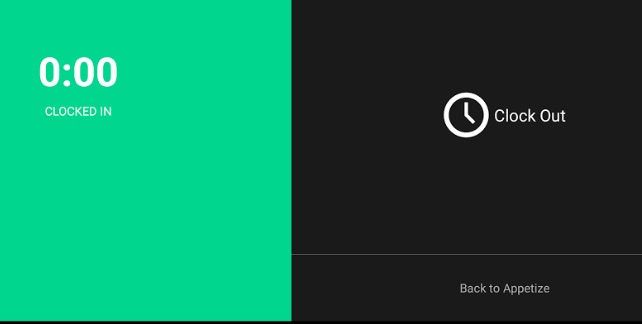
-> tap “Clock In” = your work time starts counting
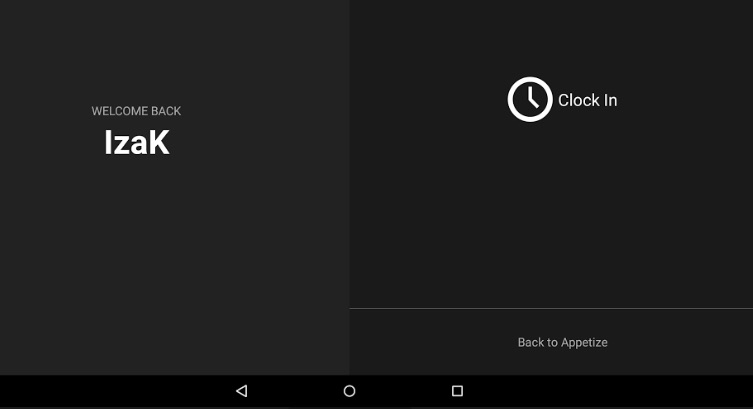
-> tap “Clock Out” = stop counting your work time. The only action you can take next is tapping “Clock In” again. The period between Clock Out & Clock In will not count up to your work time
-> tap “Back to Appetize” = you can use main menu for orders. It does not stop tracking your work time. To go back to Manage Timeclock, tap it again in the left Menu
2. Breaks
-> An Employee (Cashier/Waiter) has a possibility to take a break during shift
-> Thanks to the feature, the work time tracking is not interrupted
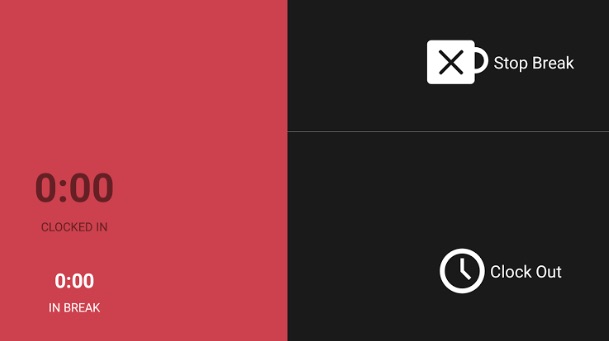
-> The “On Break” time is counted as a separate entry
ACTIVATE’S BEHAVIOR:
-> tap Left Menu > Manage Timeclock
-> tap “Clock In”
-> “Start Break” button shows up. Tap it to take a break
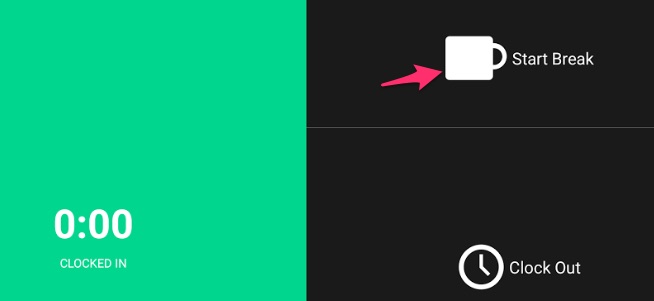
-> tap “Stop Break” to go back to your shift
3. Changing Position at clockin or during shift.
GENERAL:
-> The feature allows to work in different positions based on what type of job is needed for that shift. For example, an employee who normally works as a bartender needs to work as a cashier for a shift.
PRECONDITIONS:
-> Before using the feature in the app, it is necessary to configure change position settings on Connect. For more info on how to do it, please refer to functional docs here http://appdate.vipserv.org/appetizedoc/2016/12/14/shiftplanner-setting-and-adding-available-positions/
-> Then, go to Connect > Options > Permission Sets > Timeclock 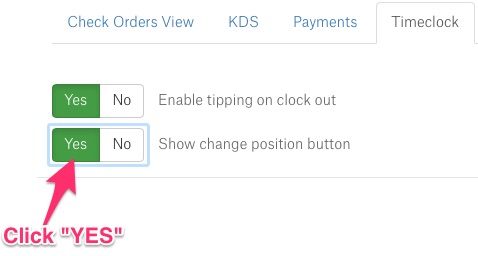
-> Decide, whether changing position requires manager PIN (choose YES/ NO in Timeclock Permission Sets).

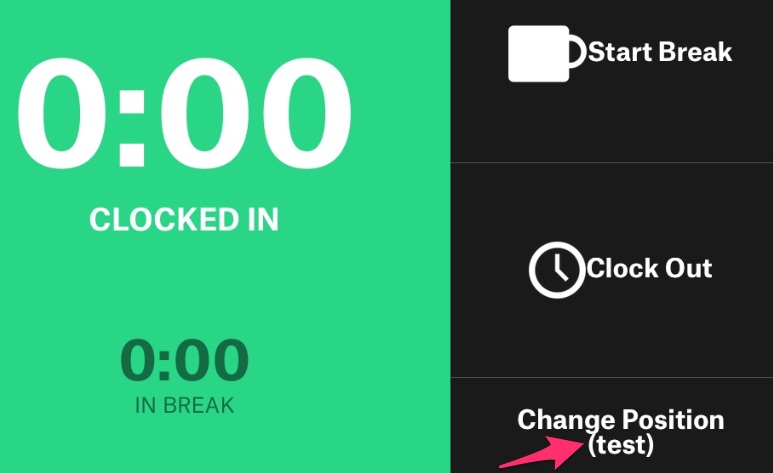
ACTIVATE’S BEHAVIOR:
-> you have your Shiftplanner account properly configured
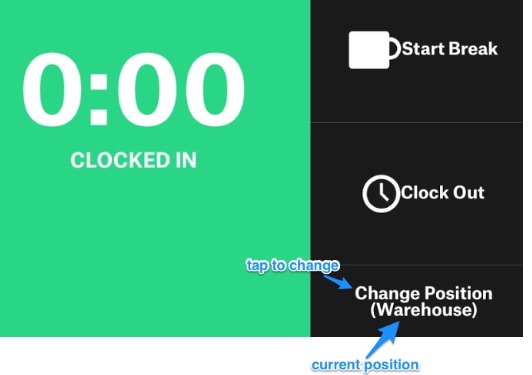
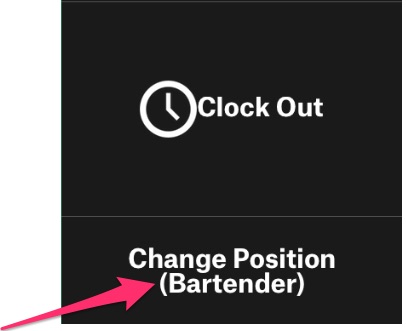
-> go to “Manage Timeclok” in the left menu
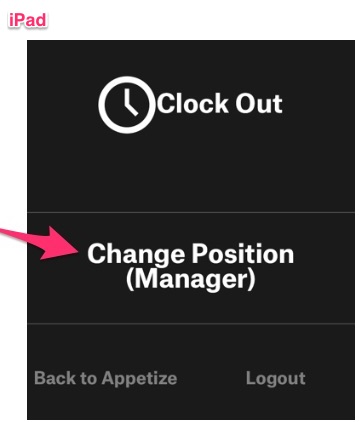
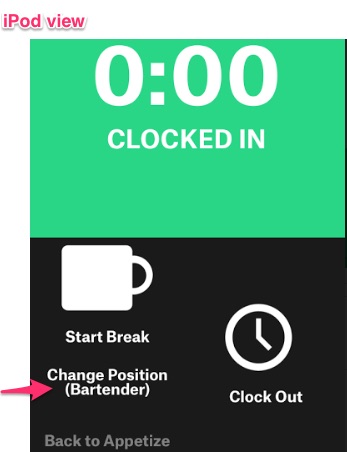
-> “Change Position” button is added to Manage Timeclock view. Tap it to change your current position indicated in brackets (Warehouse)
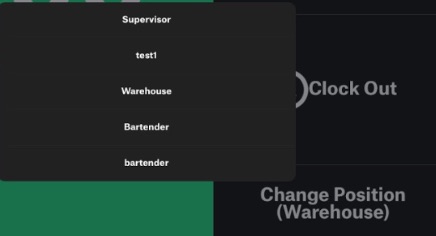
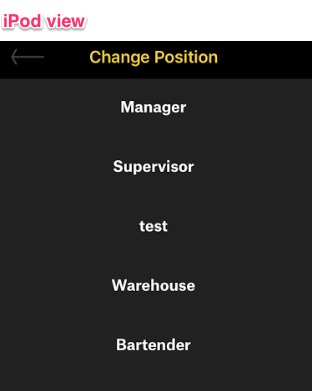
-> when you tap “Change Position”, a list with available positions shows up. Tap to choose one of them and change
4. Enter Tips on Clock Out
-> the feature allows to add tips when an employee is tapping Clock Out
PRECONDITIONS:
-> You need to set the right Permission Set here: Connect > Options > Permission Sets> Timeclock
 ACTIVATE’S BEHAVIOR:
-> Manage Timeclock (left menu) -> Clock In
-> then, tap “Back to Appetize” to make some orders + add tips
-> next, go to Manage Timeclock again and tap Clock out
-> 2 fields on the Clock Out screen show up: CC Tips (not editable) and Other Tips (editable)
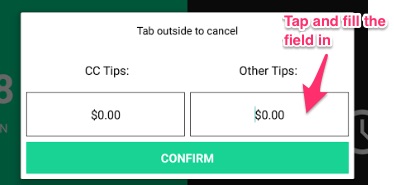
-> don’t forget to tap the green “CONFIRM” button to save your changes
5. Require Clock In before using POS.
-> the feature is about blocking / allowing using POS depending on the current status of employee’s shift
-> when Shared Account logs into Activate, the app downloads all assigned Shared Employees/Managers under Shared Logins array. It contains user PINs, IDs but also their current Time clock status: In, Out or Break.
-> When user’s status is unknown, Activate checks it after he logs in using PIN with / time / status call.
Screen displayed after depends not only on their status but also on Allow POS Off Clock / Allow POS On Break setup – managed from Permission Sets > Menu tab.
-> for a detailed description of all possible scenarios please refer to functional docs here http://appdate.vipserv.org/appetizedoc/2015/08/28/time-management-screens-conditions/
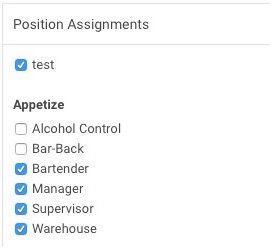 -> Tick/untick the positions that you want to be active/inactive for a given employee. The positions that’re under Appetize = default positions. New positions can be added – see the next point.

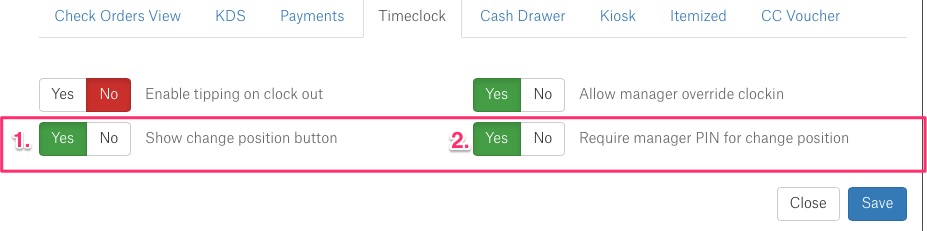
 2. Require manager PIN -> click YES if you want to protect the new button with manager PIN.
 -> then, when changing position, a list with available options shows up
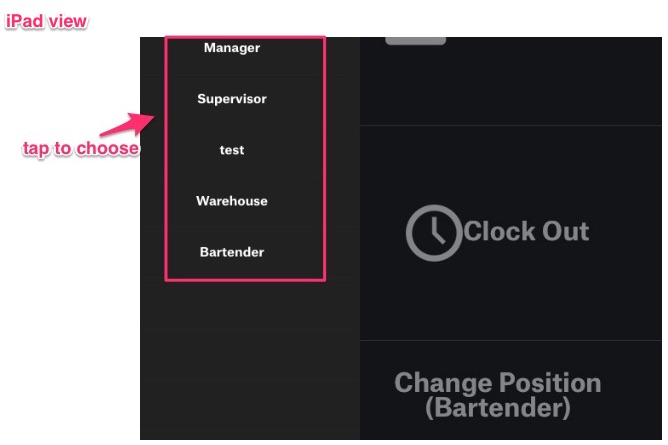
 -> result: position is changed successfully, the clock in time does not change and is still normally counted