Activate iOS 6.7

Contents: 
New
1. MONERIS
1.1 Moneris changes in POS
1.2 Moneris – Easy Split mode
1.3 Moneris in REST mode
1.4 Moneris Quick Checkout
1.5 “Cancel” Moneris transaction button
Fixed

NEW: [ps2id id=’new1′ target=”/]

  1. MONERIS [ps2id id=’mo1′ target=”/]
     1.1 Moneris changes in POS (Point of Sale) [ps2id id=’posc’ target=”/]
    – Moneris UI is slightly changed in POS view 
    – Electronic signature – will never show up in the app for Moneris transactions, but “physical” signature line on receipts will be printed
    – possible Moneris payment methods: scan, swipe, tapping the card and manual entry 

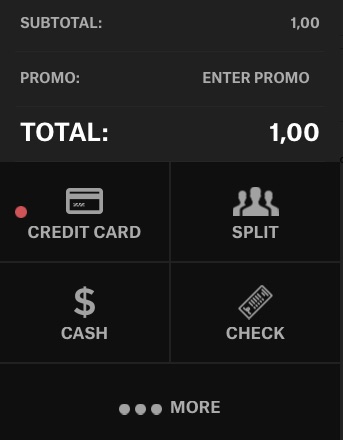
    – “Credit Card” button redesigned. As you can see on the below screen, a small dot (red or green) appears next to this tender type.
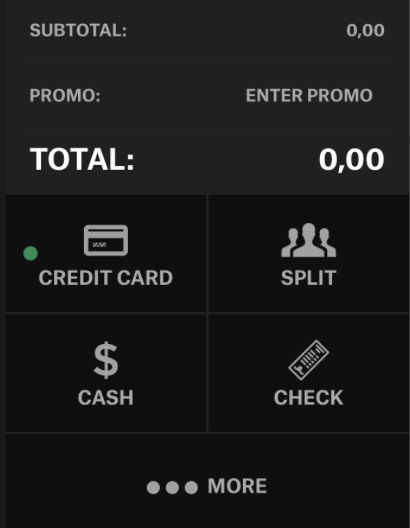
Red – if Moneris terminal is not paired
    Green – if Moneris terminal is paired

    1.2 Moneris in Easy Split mode [ps2id id=’monsplit’ target=”/]
    – generally speaking, we’ve improved the whole Easy Split functionality so that it works fine with Moneris
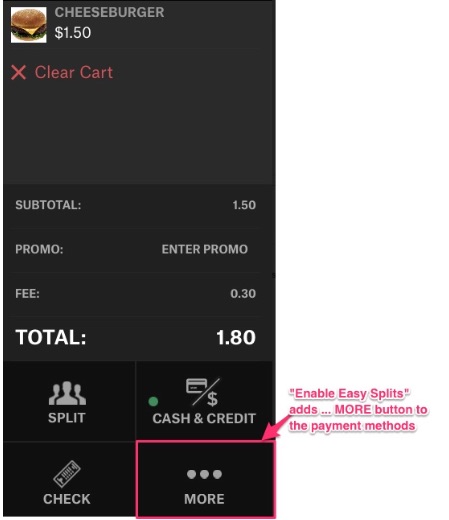
    Note! Easy Split must be enabled for the account via Connect > Permission Sets > Payments > Easy Split = YES- Cash & Credit buttons are separated

    – after adding some items to the cart you can tap the
    and you’ll see “Credit Card” used to process Moneris payments
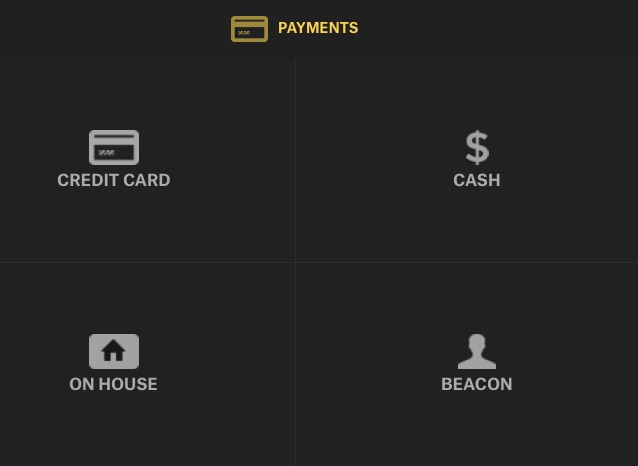
– when “Credit Card” is tapped, user is asked to enter the remaining amount of money that will be withdrawn from the card
    – then, two green buttons will show up


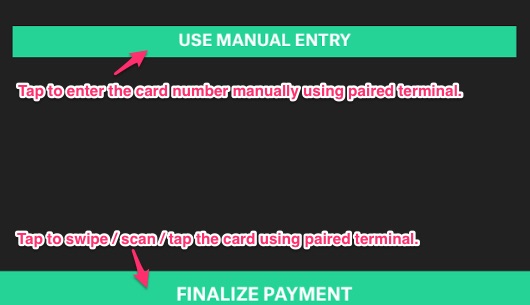
    Remember that after that, all the checkout steps for Moneris payments are done using a correctly paired terminal. 

    1.3 Moneris in REST mode [ps2id id=’monr1′ target=”/]

    – creating REST orders works as usual – so for the Connect accounts that support Restaurant mode 
    – The only difference now is that you can pay with Moneris (so only when Moneris terminal is connected to the device)

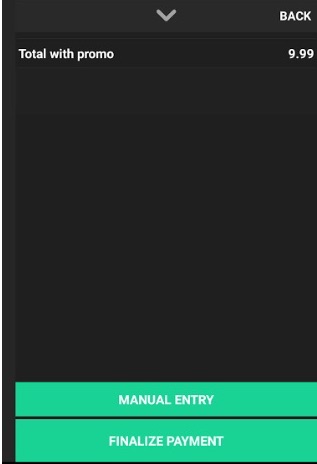
    – the UI is slightly changed. When in REST mode you add some items to the cart and tap “Credit Card” payment. Next you’ll see the two green buttons redesigned. They both support Moneris transactions
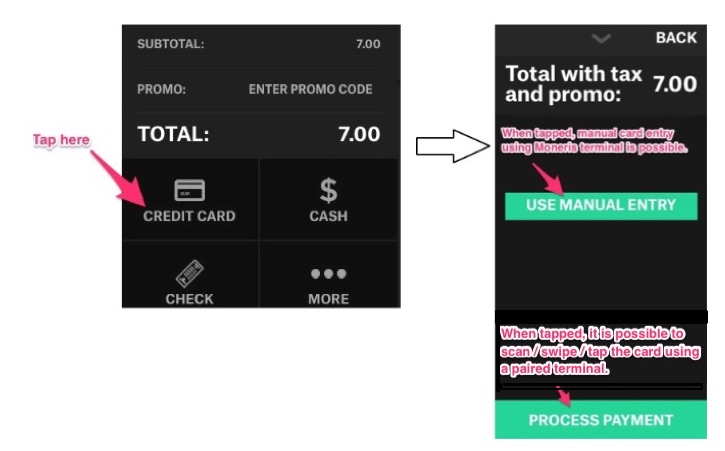
    – if you want to refresh your knowledge of REST mode general flow – go ahead and read on in our Functional docs


    1.4 Moneris – Quick Checkout [ps2id id=’qcheck’ target=”/]
    – now it is also possible to pay with Moneris when “Quick Checkout” button is chosen 
    – In order to use Quick Checkout enable Quick Checkout as a payment method in the Employee Roles in Connect. Then in Activate a new icon will be visible in upper right corner– then enter the amount that will be withdrawn from your card
    – and tap “Credit” button 

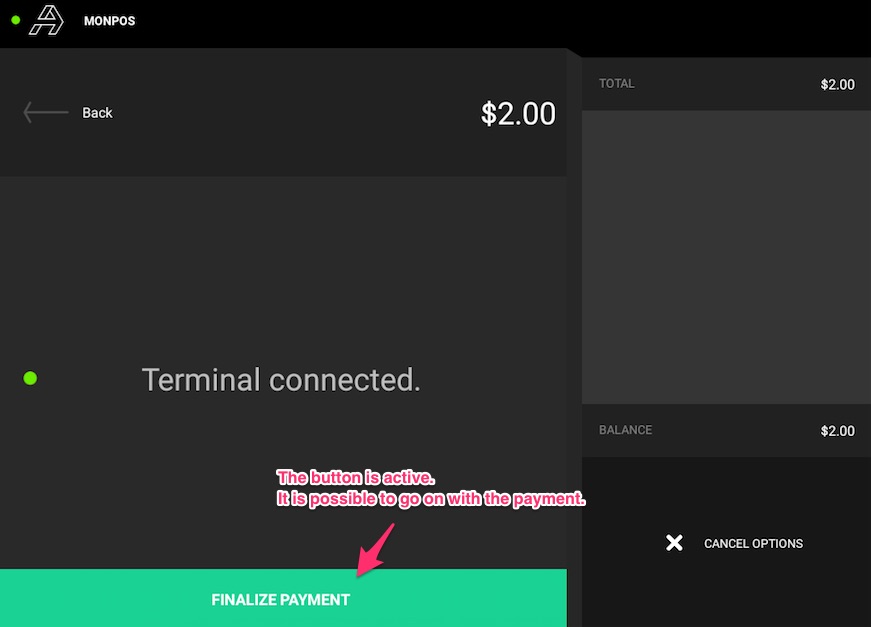
    – then, card is verified using a paired terminal and processing checkout begins
    1.5 “Cancel” Moneris transaction button [ps2id id=’cancl2′ target=”/]

    – When Moneris transaction is being processed – progress spinner is displayed
    – Since there might be situations – like terminal not responding we show “Cancel” button after 10-15seconds that cancels the transaction so that we’re not stuck with spinner blocking our UI
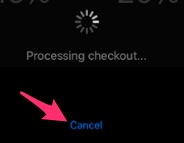
    – Additionally, a message reminding users to press the physical red button on a paired terminal shows up.

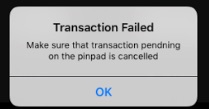
Fixed: [ps2id id=’fixes1′ target=”/]
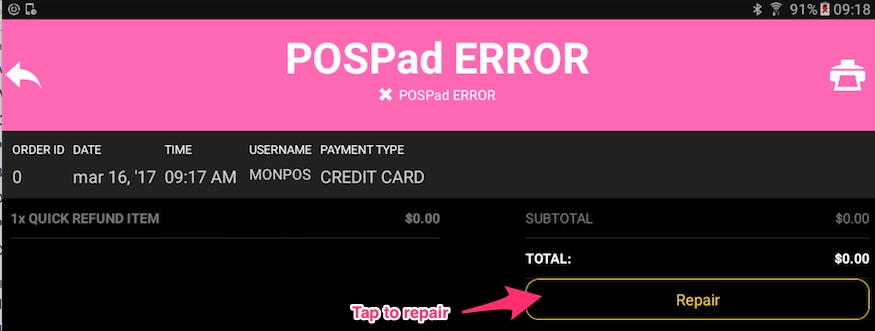
  1. Check orders bugs. 
  2. Moneris bugfixes.
  3. Timeclock – “Clockin Override” button visibility. 


Activate Android 2.9.4

Contents: (click to jump to the section)
New
1. Moneris payment – General
Configuration (Basic Steps)
2. Payment Flow – Easy Split mode (a)
3. POSpad error tab

Fixed

New

  1. Moneris Payment.

    GENERAL: [ps2id id=’kd’ target=”/]
    -> Activate Android supports Moneris in Easy Split mode  in POS (Point of Sale) only
    -> The gateway supports cards such as Visa, MasterCard, Diners.
    -> Moneris is like any other CC payment, but it can only be used when the device (iPad / tablet / ELO) is paired with special iCMP Ingenico terminal.
    -> On Android side you need a device (Samsung)  paired with iCMP vendor. If terminal IDs needed – they are the serial numbers of swipers (e.g. I6016359)
    -> Payment interface when Moneris is active for Activate account is a bit changed now. Credit Card payment method is separated from Cash button.
    -> lack of digital signature confirmation screen


    CONFIGURATION (Basic Steps):  [ps2id id=’conf1′ target=”/]
    a) pair iCMP paypad via bluetooth with your device( remove all previously paired devices from iCMP itself)

    b) Database – set up the payment gateway in gateway_credentials table for your Venue


    2. PAYMENT FLOW – Easy Split mode

    a) Payment Flow, POS account, Easy Split = YES

    Add some items to the cart and tap the “More” button. This will allow to proceed with Moneris payment.

    Then, tap “Credit Card” button


    Note! Adding TIP for Moneris is not supported yet, but when it will be – adding tip window will show up BEFORE adding payment.

    Next, choose either “Manual Entry” or “Finalize Payment” button.

    When choosing Manual Entry, user is no longer asked to type the CC number using Activate number field. Now all payment steps are done on a paired iCMP device. Using the paypad enter the CC number and then, expiry date. The correct format of expiry date is: MMYY (M=month, Y=year). YYMM would be declined.

    When choosing Finalize Payment user is prompted to swipe / tap the card using iCMP.

    ! SIGNATURE: For Moneris signature confirmation screen has been removed.

    Additionally, since Moneris payments will operate only using iCMP terminal, there will be 2 new screens that would indicate whether terminal is connected and you can finalize the transaction. If terminal is disconnected, there will be no possibility to go on with the payment.

    below – sample “Terminal connected” screen


    3. POSpad error tab [ps2id id=’posp1′ target=”/]

    New tab added in “All Orders” view.

    POSPad error tab is a place where all sorts of faulty transactions go. So those that were declined, the card number was invalid, expiry date was “partly true” and you know…all the possible wrong scenarios. In case when something goes wrong, there comes the rescue “Repair” button.
    “Repair” button is placed next to the wrong transaction and it functions in a very similar way to “Refund”. So it tries to refresh, restore or re-checkout the payment again.

    When “Repair” is tapped, you’ll be asked again to swipe/tap/enter manually your CC number on iCMP. Then, the external device would show the alert message like “Purchase correction”. If the purchase correction is not successful, then the iCMP would show “Refund”. Once again, refund needs to be confirmed by swiping/tapping/entering CC number on iCMP.


Fixed: [ps2id id=’fix1′ target=”/]

  1. Age verification alerts visibility.
  2. Fabric crashes hotfix.
  3. Inventory counts view fix.