CONTENTS:
New
1. Tax per Item
1.1 General Information
1.2 Sample Cases
1. One taxable item, tax type: Inclusive
2. One taxable item, tax type: Exclusive (Percentage)
3. One taxable item, tax type: Exclusive, tax value: Flat
4. One taxable item + multiple exclusive tax rates
5. Two taxable items
6. Price Threshold
7. Tax per Item & Discounts
Fixed
New [ps2id id=’mkekr’ target=”/]
- Tax per Item [ps2id id=’tpimfkmff’ target=”/]
1.1 GENERAL INFORMATION: [ps2id id=’ginfkmm’ target=”/]
-> a brand new possibility that allows to add customized Tax per individual item(s)
-> available Taxes per Item: Types -> inclusive, exclusive, Values -> flat, percentage
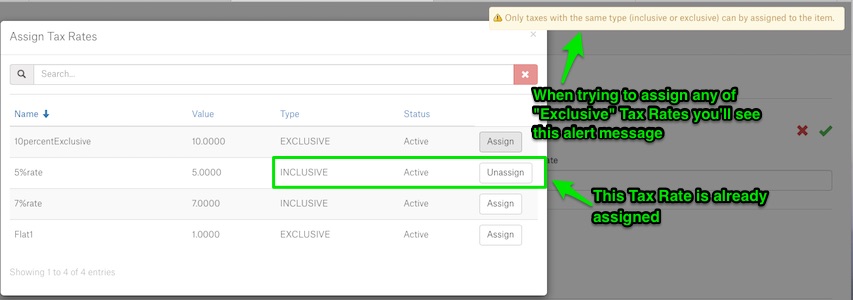
-> you can add more than one Tax per Item (called “Tax Rates” via Connect), but they need to be of the same type, so i.e. it’s fine to add 2 Tax “Inclusive” Rates. Adding Inclusive & Exclusive Tax Rates would result in a failure
-> you can mix flat & percentage Tax Values
-> Tax per Item is always applied to individual item prices
-> you do the settings steps via Connect and then this info is sent to Activate where you can see the correctly calculated Taxes
-> for more info on Connect configuration steps – go here
Note! When ‘Tax per item’ is enabled on a Venue Activate version that are not supporting “Tax per Item” will not be working properly in terms of calculating taxes. Tax will be always 0.
1.2 SAMPLE CASES: [ps2id id=’samlkdd’ target=”/]
Go through the below sample Tax per Item scenarios to find out more about Tax per Item.
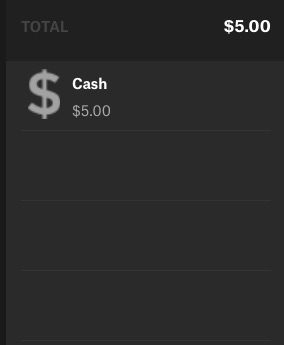
1. One taxable item, tax type: Inclusive [ps2id id=’kslo1′ target=”/]

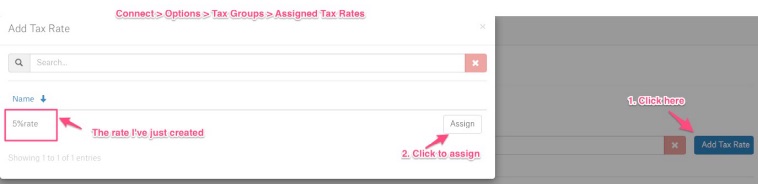
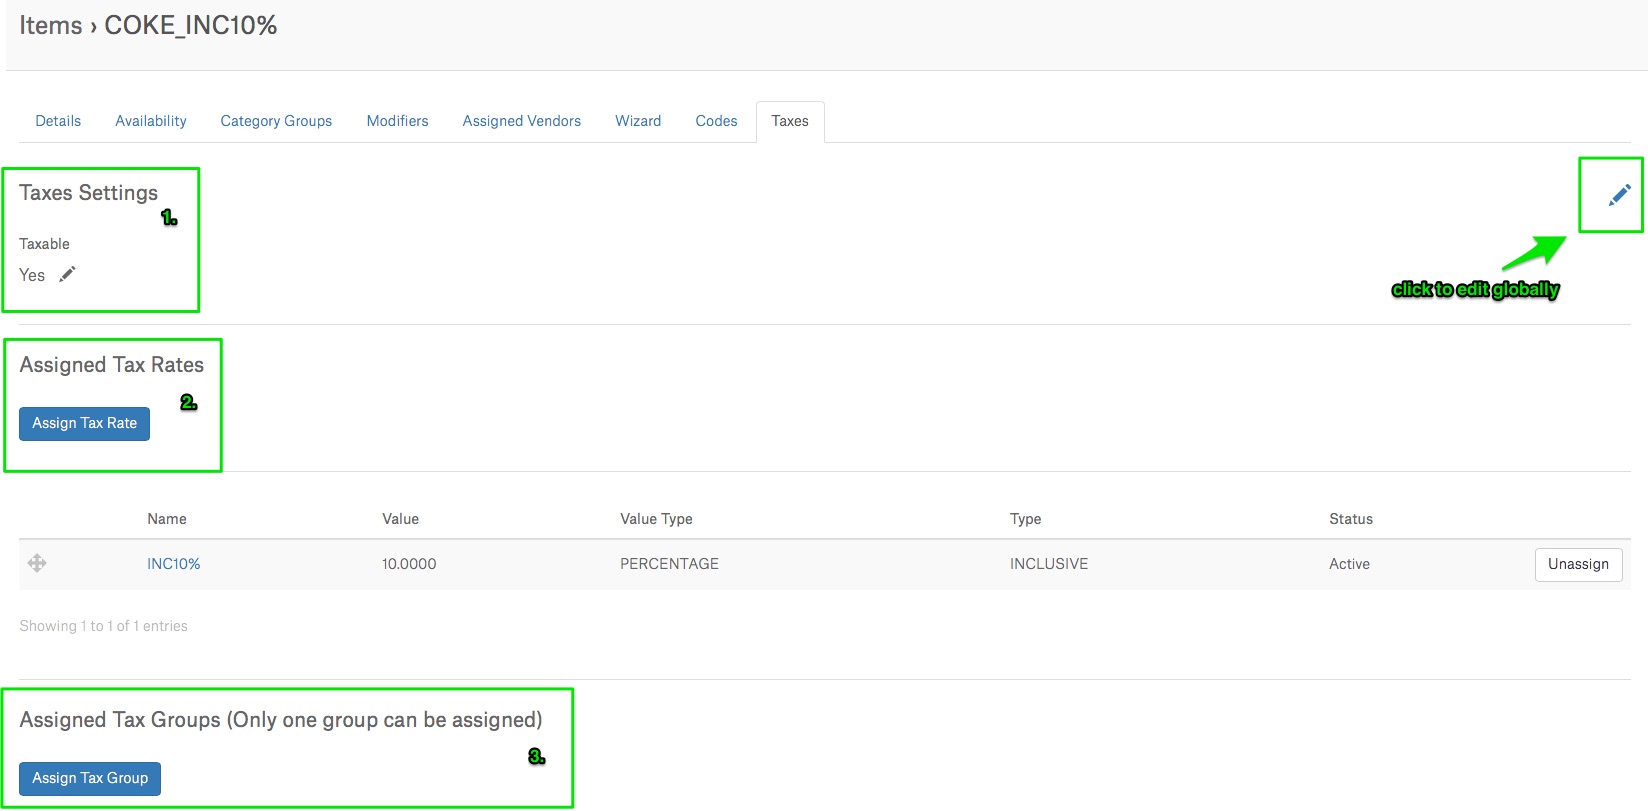
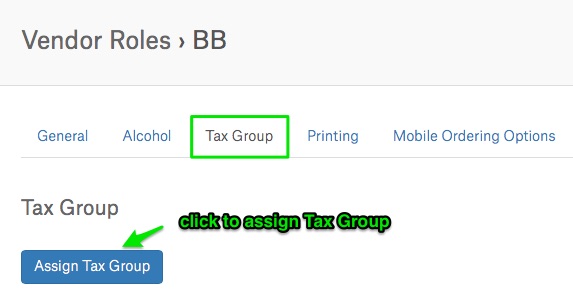
-> the Tax Rate is assigned to my item (Items -> Taxes -> Assign Tax Rate)
-> item subtotal = $1.50 (this is the price with 10% inclusive tax added)
Activate:
-> add the item to the cart
-> the displayed Total = $1.50. It includes Inclusive tax that is hidden in item’s price. So clients don’t see it.
-> Tax = Inclusive means that you will not see the amount of tax on Activate
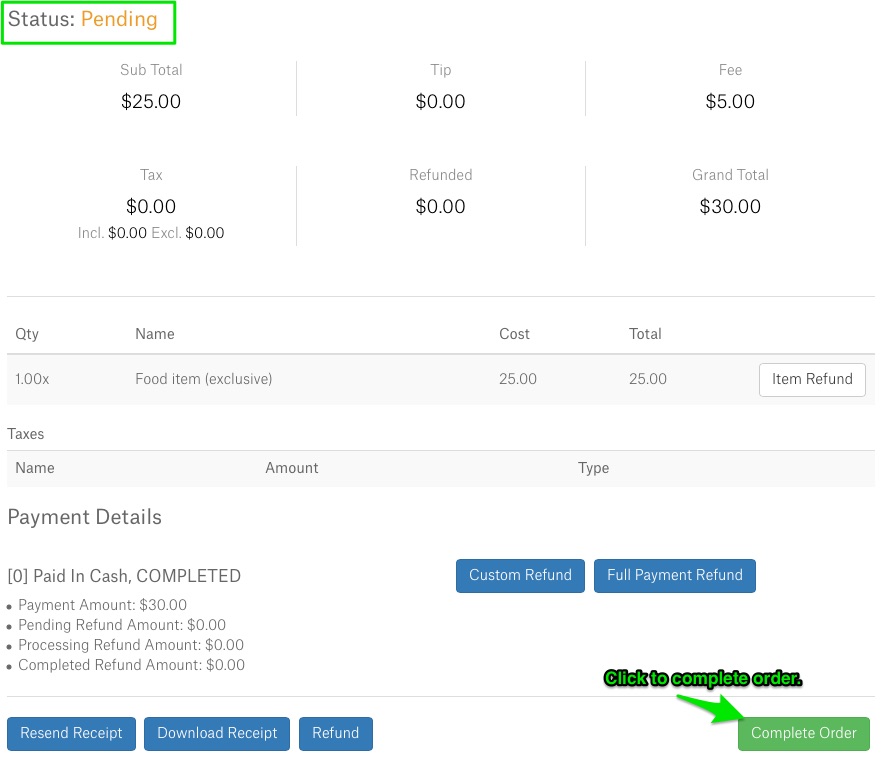
 -> you can see the precise Tax amount when order is completed on Connect / Reports
here – that’s an excerpt from Reports > End of Show > Category Sales

-> Inclusive tax amount is also visible on Orders page in Connect
2. One taxable item, tax type: Exclusive (Percentage) [ps2id id=’exkd’ target=”/]
 -> the Tax Rate is assigned to my item (Items -> Taxes -> Assign Tax Rate)
-> item subtotal = $2.00
Activate:
-> add the item to the cart
-> the displayed subtotal = $2.00
-> the displayed total = $2.20 (includes exclusive tax that is visible in “TAX” field)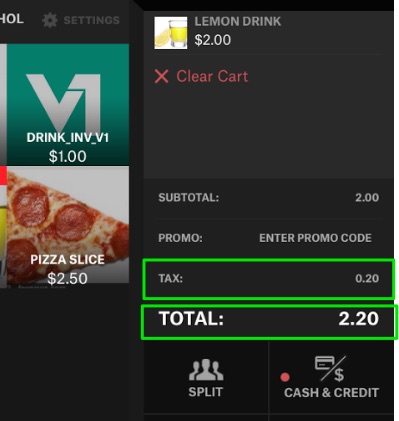
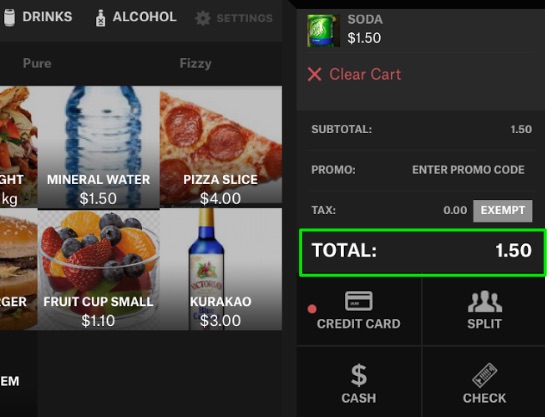
3. One taxable item, tax type: Exclusive, tax value: Flat [ps2id id=’kmd22′ target=”/]
-> the Tax Rate is assigned to my item (Items -> Taxes -> Assign Tax Rate)
-> item subtotal = $2.00

Activate:
-> add the item to the cart
-> the displayed subtotal = $2.00
-> the displayed total = $2.01 (includes exclusive flat tax that is visible in “TAX” field)
-> flat tax = always a constant $ amount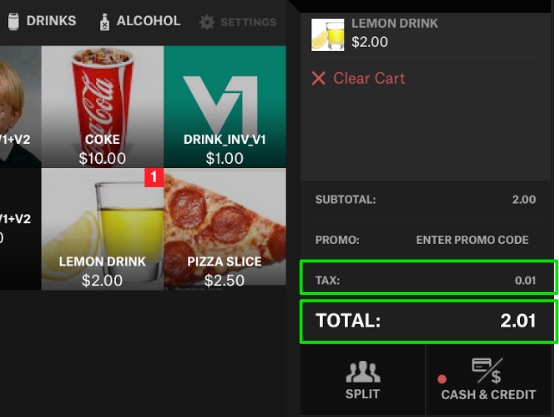
4. One taxable item + multiple exclusive tax rates [ps2id id=’fmk00′ target=”/]
-> Tax Rates are assigned to my item (Items -> Taxes -> Assign Tax Rate)
-> item subtotal = $2.00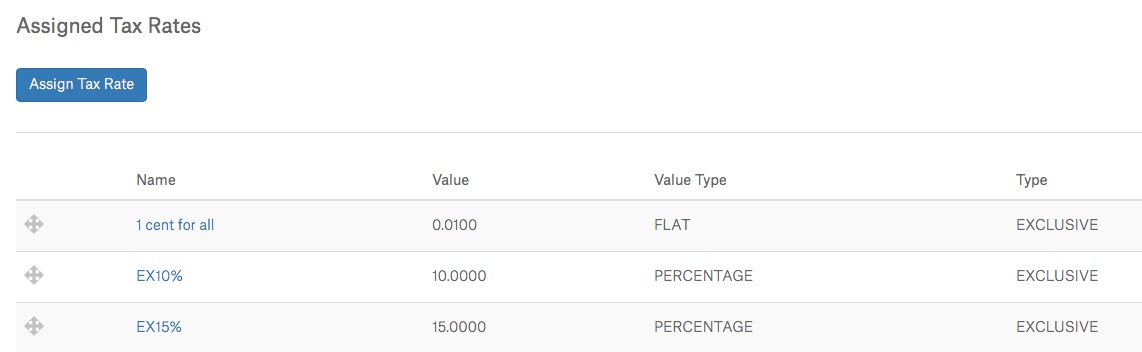
Activate:
-> add the item to the cart
-> the displayed subtotal = $2.00
-> the displayed total = $2.51 (includes 3 exclusive Tax Rates visible in “TAX” field)
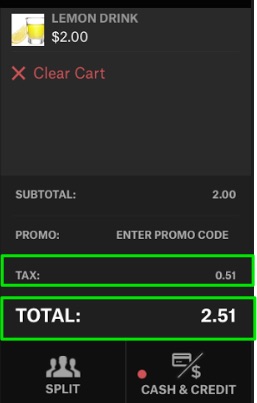 How is it calculated?
Tax per Item is always applied to subtotal. So the final Total is a sum of:
– flat tax ($0.01)
– percantage * subtotal ($2 * 10% = $0.20)
– percentage * subtotal ($2 * 15% = $0.30)
Final Tax per Item = $0.51
TOTAL = Subtotal ($2.00) + Tax Per Item ($0.51) = $2.51
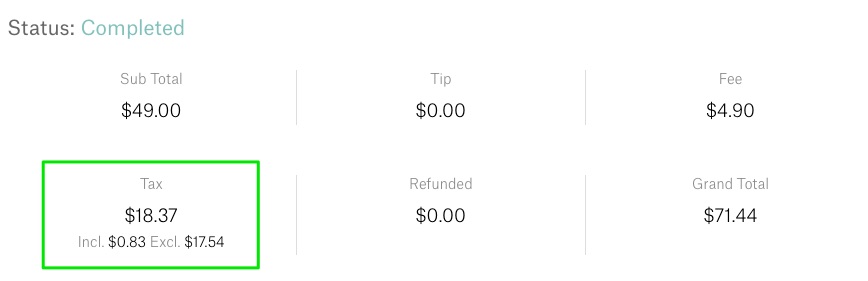
5. Two taxable items [ps2id id=’kfm44542′ target=”/]
Connect:
-> first item ($2.00) has 10% exclusive tax
-> second item ($2.50) has 15% exclusive tax
Activate:
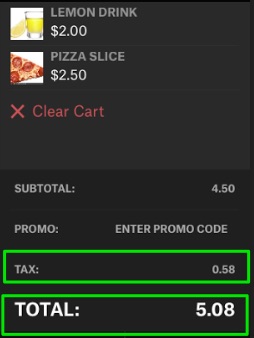 How is it calculated?
Tax per Item is always applied to subtotal. So the final Total is a sum of:
– subtotal
– Tax Rate 1: $2.00 * 10% = $0.20
– Tax Rate 2: $2.50 * 15% = $ 0.375 rounded up to $0.38
– final Tax = $0.58
– TOTAL = $4.50 + $0.58 = 5.086. Price Threshold [ps2id id=’lkfo3′ target=”/]
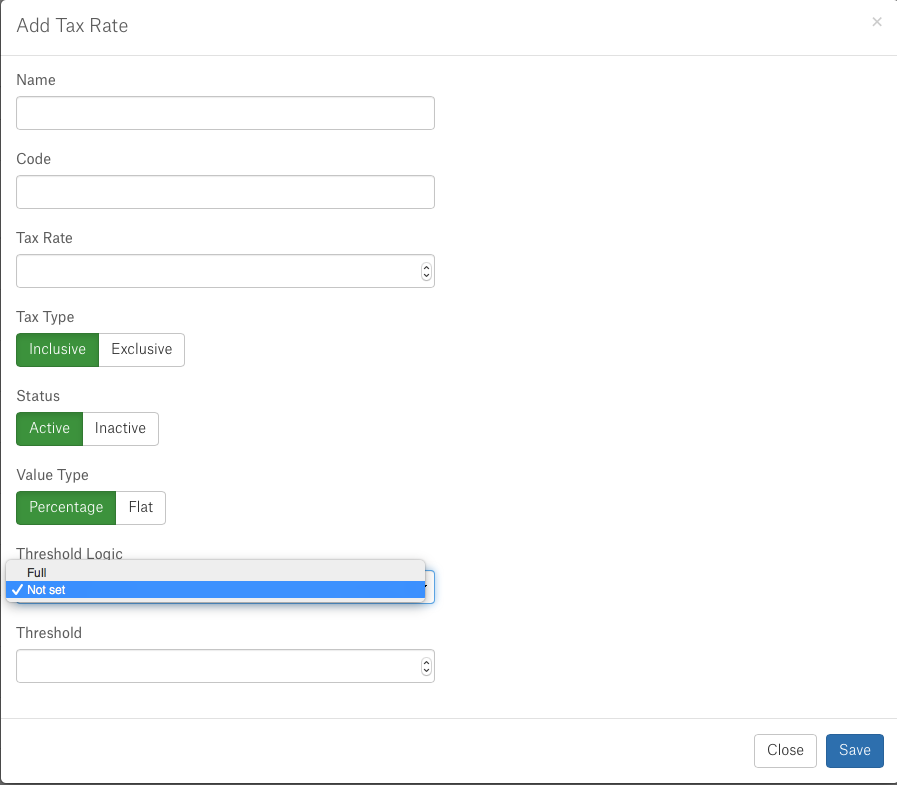
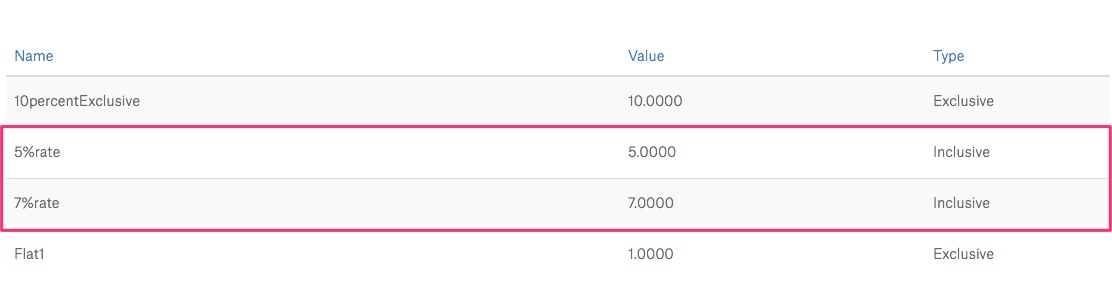
When creating Tax Rates in Connect > Options, you can set Threshold Logic and Threshold value.
There’re 2 Threshold Logic types to choose from: Not Set or Full
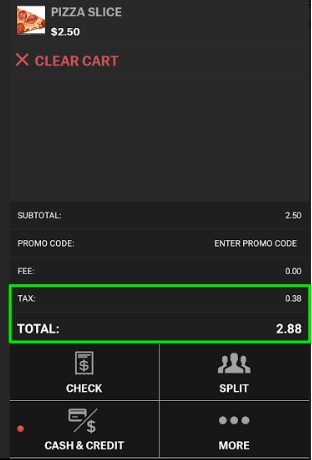
Say that you choose logic = Full and you set Threshold value to 5. This would mean, that the item that costs less than $5 will not be taxable.Connect > Options > Tax Rates
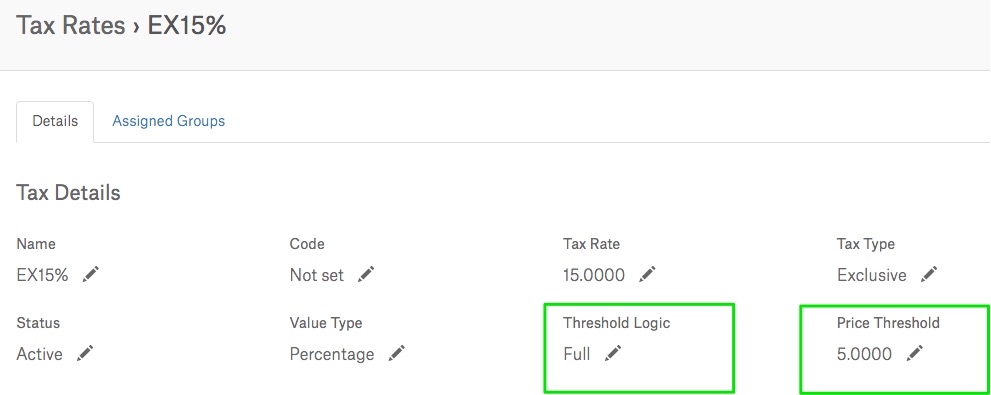 So, the above Tax Rate setting would cause that items that cost less than $5 will not be taxed.
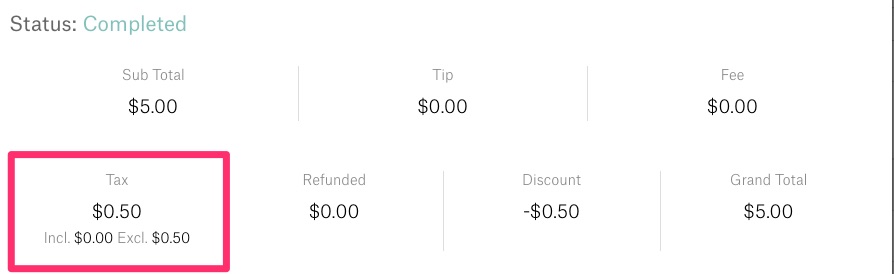
7. Tax per Item & Discounts [ps2id id=’fk45m55′ target=”/]
There is a new flag in Connect > Options > Discounts.
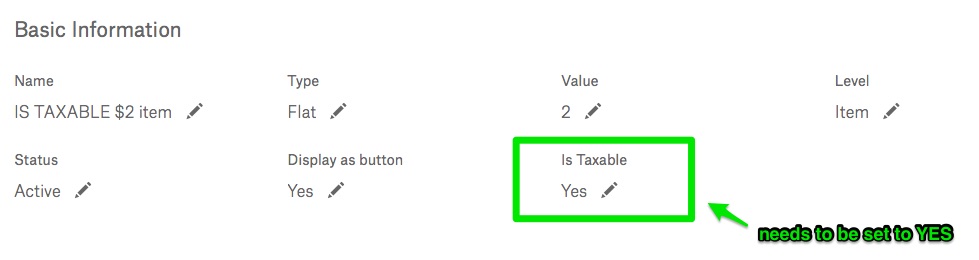
When adding new discount to item it is possible to mark it as Taxable (Yes/No). But what it means?
 Say that you apply Discount (taxable = YES) to your item that has Tax per Item active. When applying discount via Activate, you’ll see that the final Tax per Item amount will be calculated from the price of an item after adding discount.
If the applied Discount is non taxable, the final Tax per Item value will be calculated based on the initial item price (before discount).
Example:
Tax Rate = Exclusive (15%)
Discount = 10% – is taxable
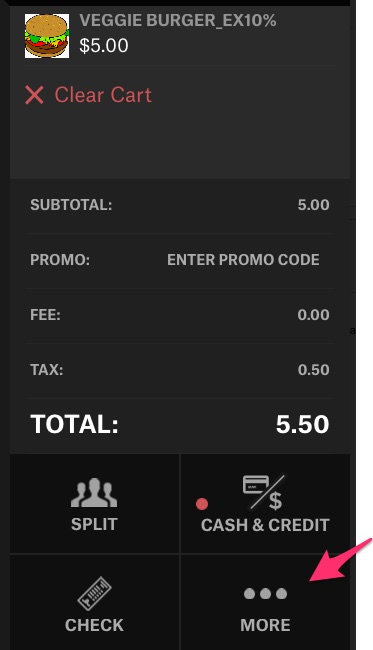
item subtotal = $2.50Step1 – I add my item to the cart. Tax per Item (15%) is calculated.
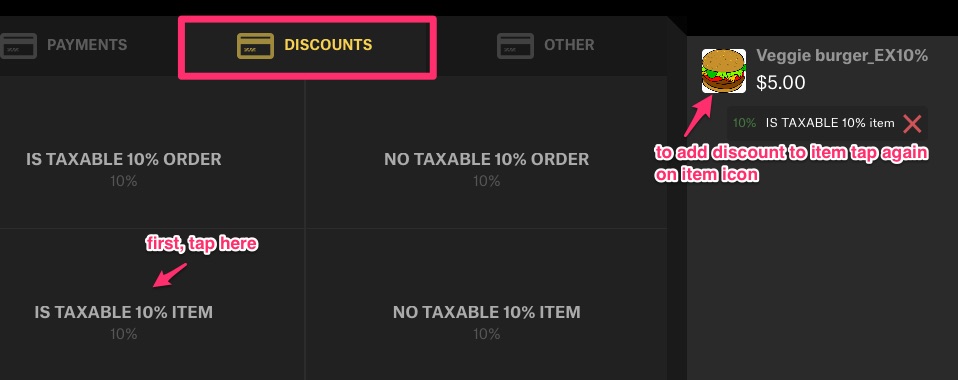
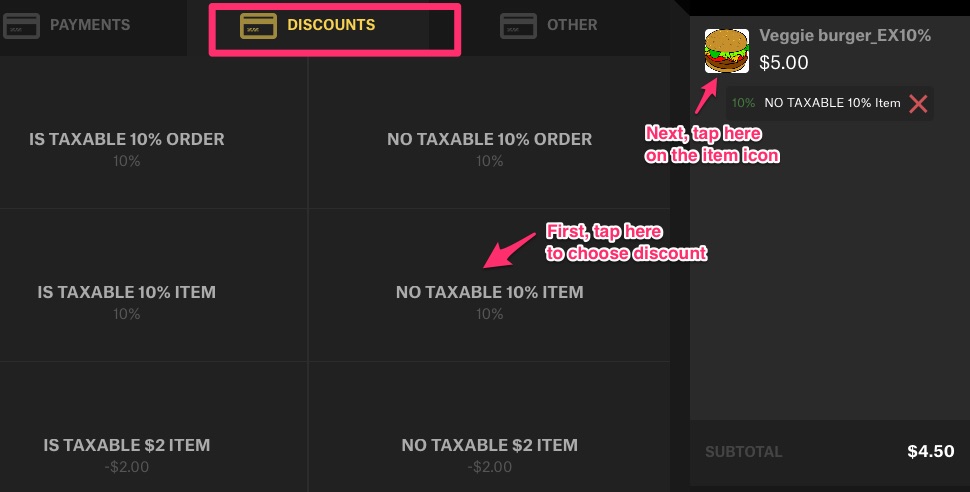
 Step2 – I tap “More” button and go to Discounts. I decide to choose “Is Taxable 10%” discount. As you can see, the subtotal changes to $2.25 as discount is applied to item’s raw price (so that’s $2.50 * 10%).
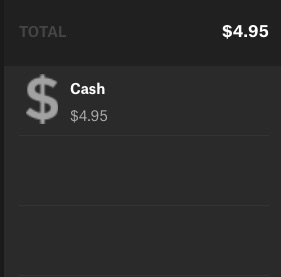
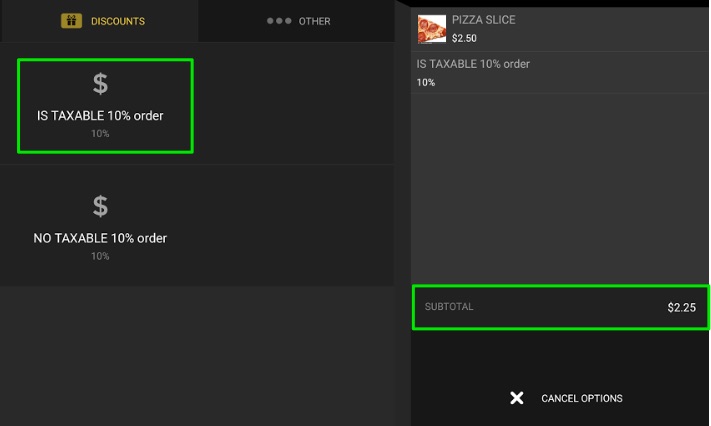 Step3 – I want to pay for my item, so I go to tab “Payments”. There you can see that item’s price has been updated. Tax per Item is being calculated once again.
Remember, that our setting of discount was “is taxable”. This implies that Tax is calculated based on the price of an item after adding discount.
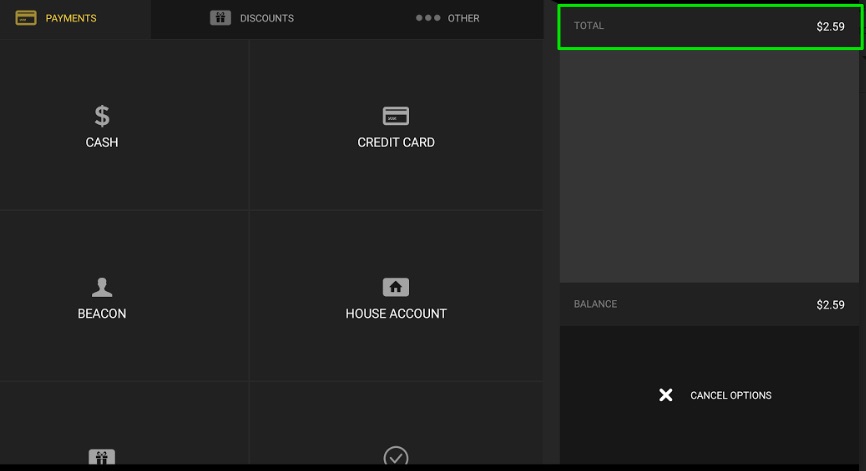 So, we’ve got our $2.50 item that costs $2.25 after discount.
Now, we’ve got 15% Tax per Item that is applied to $2.25 ($2.25 * 0.15 = $0.34). And now we’ve got our new Total that is a sum of $2.25 + $0.34 tax.
Fixed: [ps2id id=’kgm55′ target=”/]
1. Checkout button that was missing in some cases is now fixed.
2. Tax per Item issues.

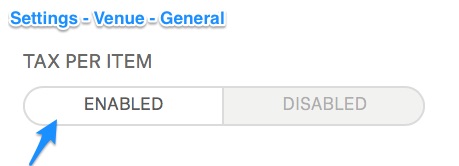 – choose “Enabled”
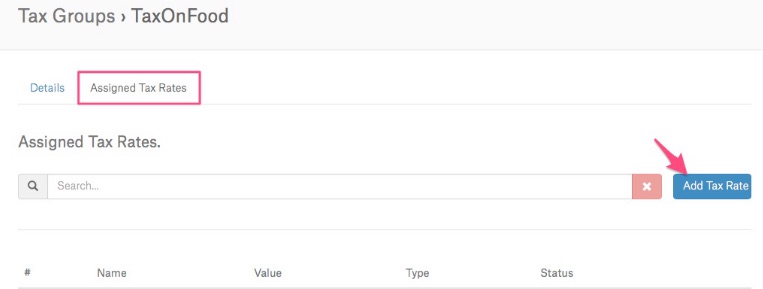


 -> Then, I want to assign those two Tax Rates to item
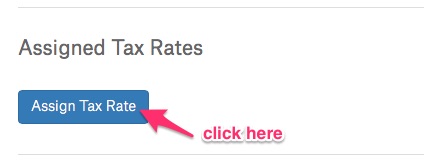
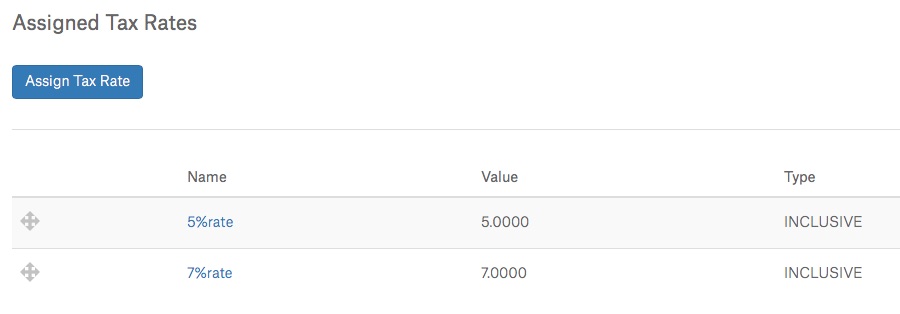 -> possible actions: click – “Unassign” on the right side of the tax rate to remove it from item
 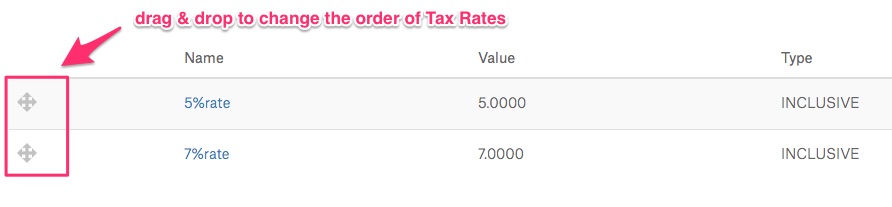 -> when more than one Tax Rate is assigned, it means that all Tax Rates are applied to the assigned item (one by one). The first Tax Rate in order gets