New
-
Member Benefits – integration for Skidata.
This new feature enables SKIDATA clients to get automatically assigned discounts per item or per order. When customers scan their loyalty card all the assigned discounts are added to the order. Member Benefits will function in both Activate modes: normal and Retail.
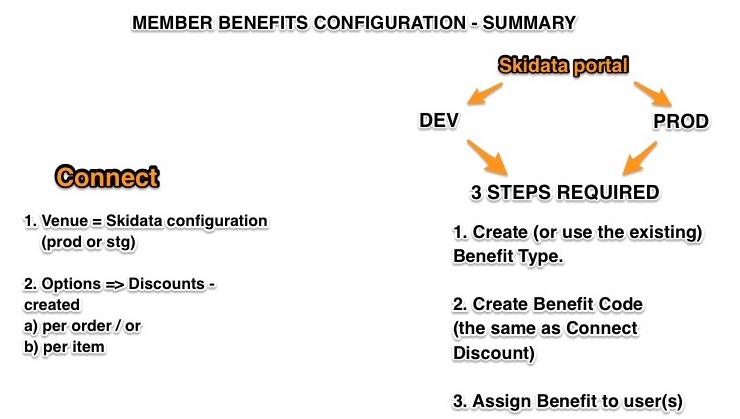
Member Benefits are enabled via Connect and the SKIDATA portal. Below you’ll find some shortened steps on how to configure Benefits correctly:
- Easy Split enabled (Connect > Options > Permission Sets > Payments)

- Note! Member Benefits will work only if SKIDATA is enabled for the venue
- Connect – Discounts need to be created first, only then Member Benefit(s) will work

- Next, on SKIDATA settings page Benefit Codes need to be added. The Benefit Codes must match the Connect discounts in terms of: name, value, type.And below – what happens on Activate when Member Benefits set correctly:
-> Create an order. The Customer’s loyalty card is always scanned before payment
-> Tap “More” button that redirects you to Easy Split mode
-> Go to “Other” and tap Assign Loyalty Card
-> Scan the QR code
-> All the important stuff that is going on under the hood but remains unseen:
– A call is made to the Member Value System
– Loyalty card information is transmitted
– All “Member Benefits” for the account are transmitted back to Activate
– Activate applies the benefits
– If stored value exists then stored value can be used to process payment
– Payment is completed using normal payment methods
– Purchase information is sent along with cached customer information back to loyalty system to record points.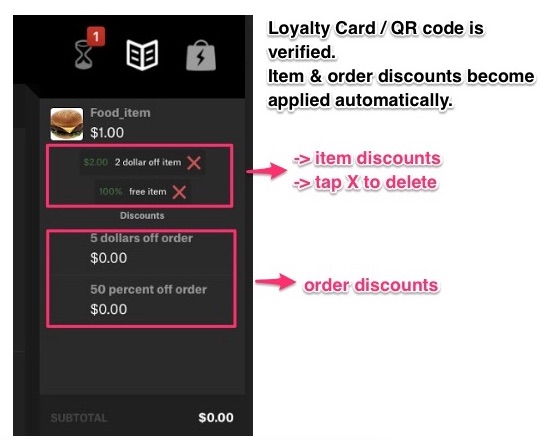
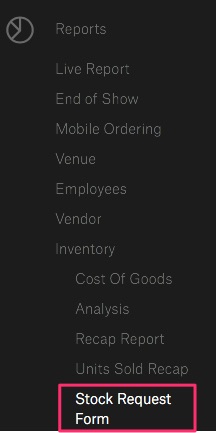
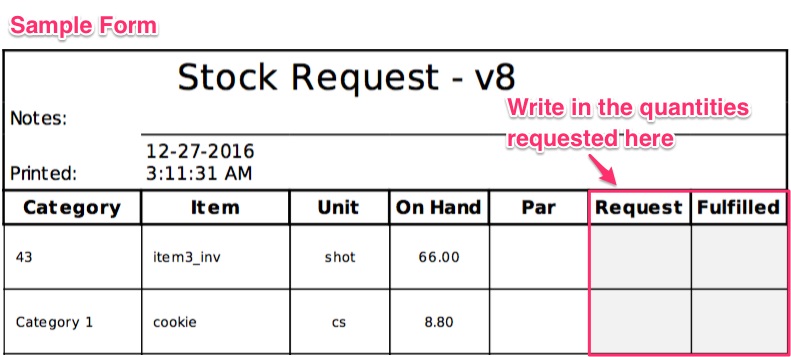
2. Stock Request Report
-> a new report used to record the amount of items to be transferred to a Vendor
-> this is a paper-based form that mimics the items on the standsheet and provides empty columns to write in the quantities requested
-> for now, this is just fill-in form
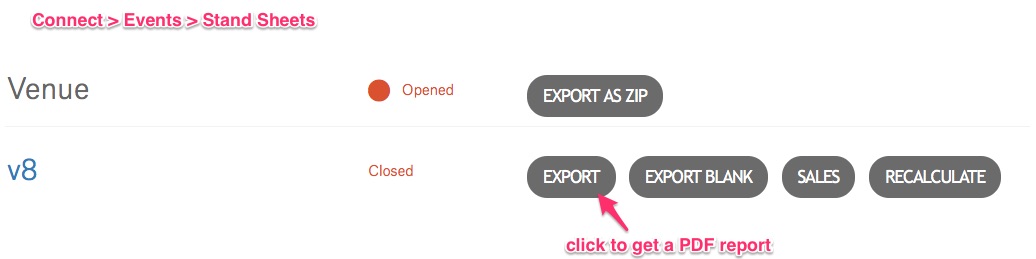
Additionally, there is “Stock Request” button added in Connect > Events > Stand Sheets.

-> if you click the button on the Standsheet view, it would print exactly the same thing as if you ran the report view for that single Vendor.
3. Re-opening StandSheets
-> possiblity to re-open a standsheet to allow users to make corrections once a stansdheet has been closed
-> re-opening standsheet is available only when the associated inventory event is still open. So, if the inventory event has been closed, users cannot re-open any standsheet
-> when the stand sheet is re-opened, the following fields are editable:
a) Act Count In
b) Waste
c) Comp
d) Count Out
-> how to re-open a standsheet?
Open this section: Connect > Events > Stand Sheets
a) click Close button [Status = Closed]
 and oops, then you realize that you need to change a value
b) click on a closed Vendor (Vendor Name)
c) click “Reopen” button [Status = Counted Out]

d) edit some fields (of course, those that are editable)
e) click Close button again [Status = Closed]
4. Inventory Items – Units restrictions
-> when item is to be sold as inventory item (Track Inventory = YES) units and conversions must be set correctly
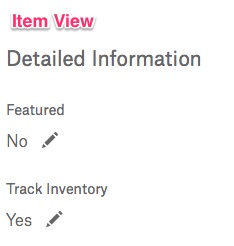 -> from now on, there will be several restrictions when it comes to sales/inventory/purchase units (for more info see the below screen)
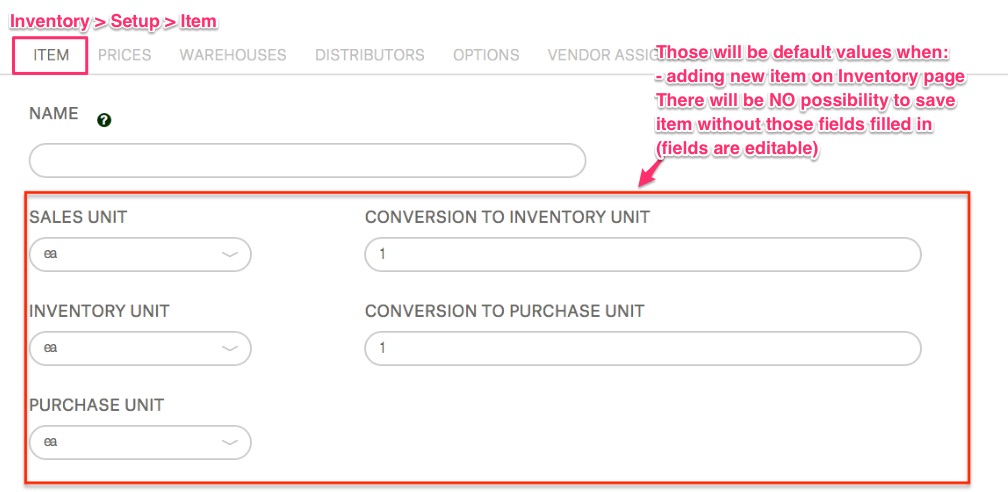 ! Note: For items that exist in the database already without all units – no change needed. When the user opens such items again to edit, they will have to save all units in the way indicated above.
5. Shiftplanning – changing positions at clocking or during shift
-> For example, an employee who normally works as a bartender needs to work as a cashier for one shift. The new feature enables adding & then, changing positions via Activate
-> To manage positions, go to Connect > Schedule and use Shiftplanning
-> Remember – your Employee Account needs to be configured correctly to be able to use Shiftplanner
Next, follow the below steps to set new positions:
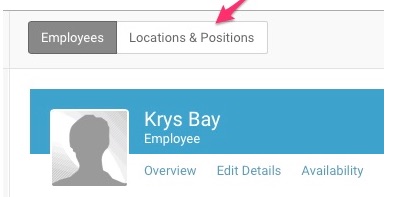
1. Connect -> Schedule -> Staff icon ![]()
2. In the search box – enter your Employee Name

3. Click on Name (example here: Krys Bay)
4. Scroll to Postion Assignments section
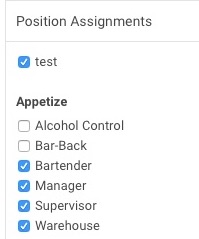
5. Tick/untick the positions that you need to be active/inactive for a given employee. Then, the ticked positions will be available to choose from during various actions for that employee. The positions that’re under Appetize = default positions. New positions can be added – see point 6.
6. Adding new positions:
– you’re still on “Staff” page
– go to “Locations&Positions”
– in this case, new positions can only be added under Appetize Test (example) heading
 – click “Add New Position”
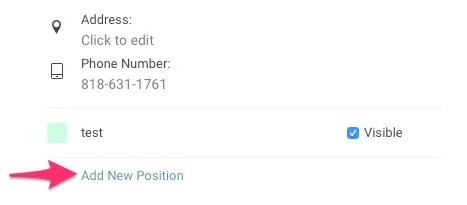 – result: the newly added position(s) are placed under “Position Assignments” on Staff > Employees page
And the basic flow for Activate functioning once Connect is set properly:
a) Employee clocks in, or is already clocked in and enters their PIN to see the Actions screen
b) Employee presses a button to Change Position
c) Employee sees their position on the current shift and a list of available positions
d) Employee selects new position and presses Save button
6. New Report – Units Sold Recap Report
-> this is a report for stock (physical) sales based on Standsheets values
-> the default filter is set for all vendors
-> to access the report go here: Reports => Inventory => Unit Sold Recup
-> the report includes such info as:
Unique ID: Unique ID for the inventory item (blank if not available)
Item Name: Name of inventory item (Grouped by Inventory Category)
Price: Price of item
Sold (Qty): quantity (stock) sold based on calculated standsheet ‘Exp Sold’
Sales: Sum of Price x Sold (Qty)
Tax: Calculated based off tax percentage assigned to inventory category
Net Sales: Sales less Tax = Net Sales
Total: Sums up totals for each inventory category
Report Total: Sums up Total values for all categories
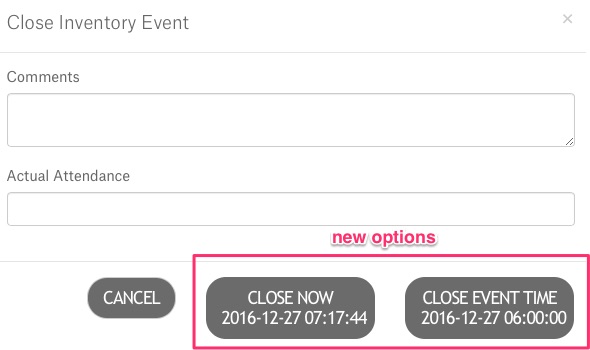
7. Closing Inventory Event – new buttons
-> similarly to opening inventory event, time selection for when the event should be closed pops up
-> go to Events > Manage Events

-> when clicking “Close” button on the Inventory Event you’ll see
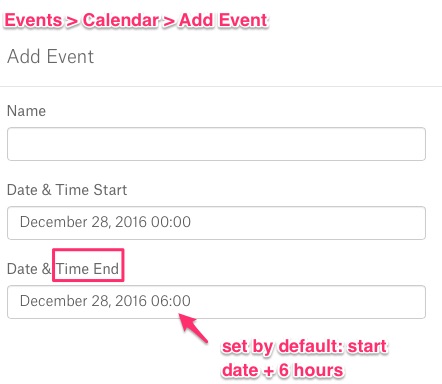
8. Creating new calendar event – End Date required
-> “End Date” is now a required field
-> the value must be greater than or equal to the start date
9. Sorting Events filter added
-> Currently, Events are sorted by the most recent

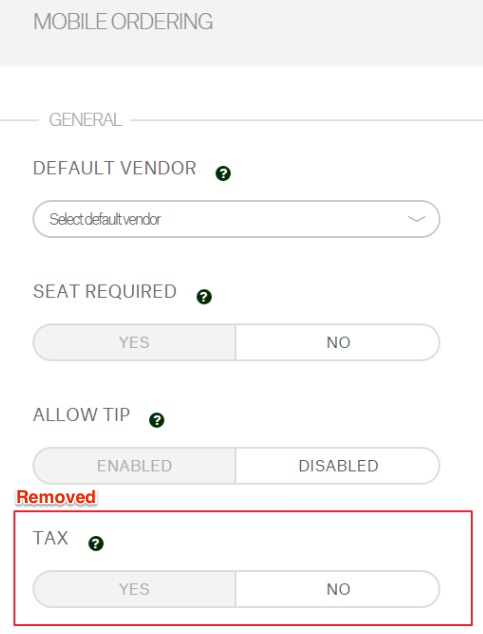
Changed
- Tax button deleted from Mobile Ordering page. From now on, all the buttons changing tax behavior are moved to Employee Role / Vendor Role / Venue.
 2. Changes in Inventory Reports. We’ve made some small, but vital changes for clients:
-> Revenue Reconciliation Report now consists “Other” Tender type, so for payments made with: coupons, vouchers, tender that is not cash.
-> Cash Room – for each employee / vendor / venue has “Other” Tender. (Events > Venue Cash Room / User Cash Room) -> TOTAL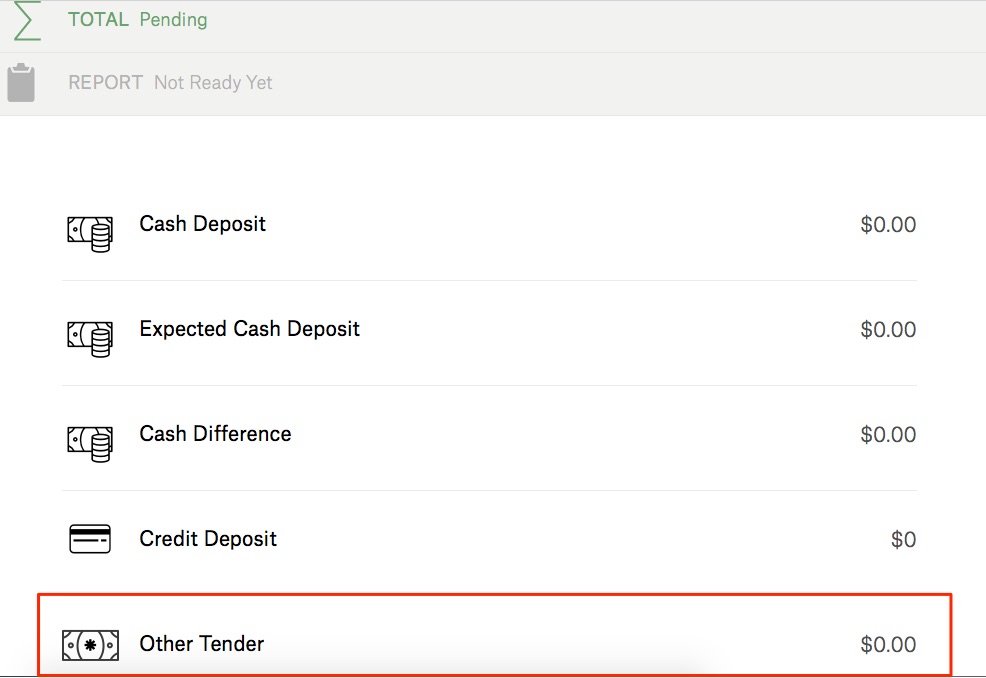
-> Audited Cash totals and selected Cash Room reports include “Other” Tender too.
3. Cashroom Report – improvements.
-> Find the report here: Reports > End of show > Cashroom report
-> a new column for Total Cash Deposit added. It contains: Bills + Coins + Drops + Banks + Adds
-> Total Tender = CashTotal Deposit + Credit Sales + Other Tender + Loyalty Value + Comps
4. Stand Sheets – improvements including: page orientation, columns width, headings, font sizes.
Plus, some additional changes when editing Stand Sheet in Connect:
 -> when you click on the opened Stand Sheet, you can enter your numbers before clicking count in or count out, but then, when you click count in to save the data, it puts your expected inventory in, regardless of the setting “use previous counted out values to count in” turned off

-> the Stand Sheet page is read only until you click count in
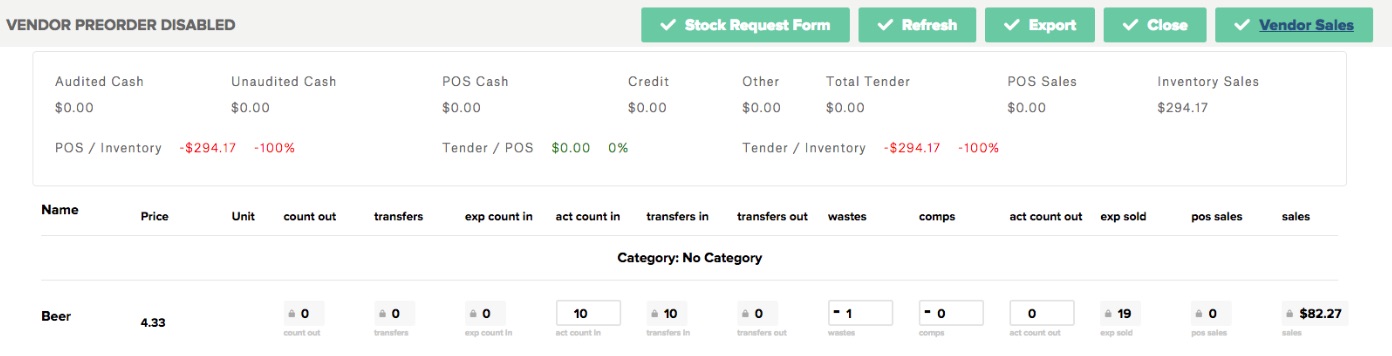
5. Refreshing Standsheets – new button.
-> Go to Events > Stand Sheets > Click on a Vendor (! status = created)

-> now users have the ability to refresh items & prices that appear on the stand sheet

Now when Vendor event has status:
- Created -> Refresh button is displayed on StandSheets page
- Opened -> Refresh button is displayed on StandSheets page
- Counted-in -> Refresh button is displayed on StandSheets page
- Counted- out -> Refresh button is displayed on StandSheets page
- Closed -> Refresh button is not displayed on StandSheets page
6. Yellow Dog import – refunded items
-> Sales data sent to YellowDog now receives info on refunded items so that YellowDog inventory reflects Connect status
-> now, it’s enough to send the refunds in previously used “Transaction” file (this file is automatically generated and sent to ftp).
item marked as +1 => when item is sold
item marked as -1 => when item is refunded
-> The refund could happen any time after the sale and could be in a different export file.
6.1 Additionally, for Yellow Dog integration – there’s option to update item name during import.
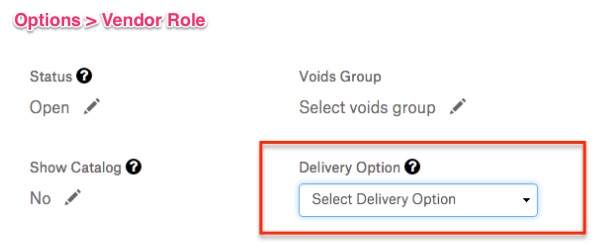
7. We’ve done some Connect cleaning – “Delivery Options” are no longer in use and the option was removed.
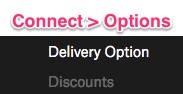 We’ve moved “Delivery Option” to Vendor Role settings
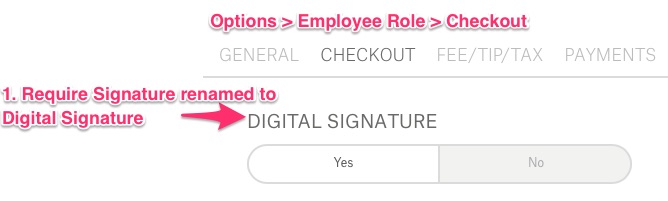
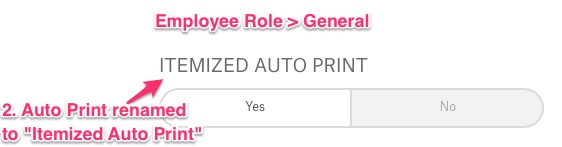
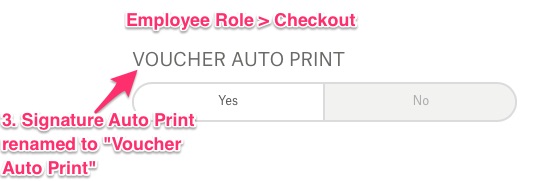
8. Print Adjustments
-> if profile type is RESTAURANT, there are some changes in Employee Role
Fixed
- Inventory Reports.
- Transfers & User Cashroom Pages – time zone fixes.
- Completed Transfers (issue with datepickers).
- Pickup Text Message for Mobile Ordering fixed.