New
- STADIS payment gateway integrated with Connect. It is similar to gateways like Fortress, allowing to redeem stored value and loaded tickets. The integration is with the STADIS cloud based system. The supported methods of payment are manual entry and swipe.
- Multiple discounts – Allows adding more than one discount to item / order. When creating a discount, e.g., 10% on Connect, you can add multiple sub-discounts with the same value called ‘codes’ that are typed in, scanned or swiped using manager cards on Activate. What’s new is that:
-> more than one discount can be applied to item/order
-> limit of usage can be assigned to codes! Note that multiple discounts can only be added when “Easy Split” view in Connect > Options > Permission Sets > Payments is enabled.
Follow the below workflow to configure multiple discount + codes on Connect:
a) Connect > Options > Discounts > Create (or use the existing discount)
b) for creating new discount have a look at the screen below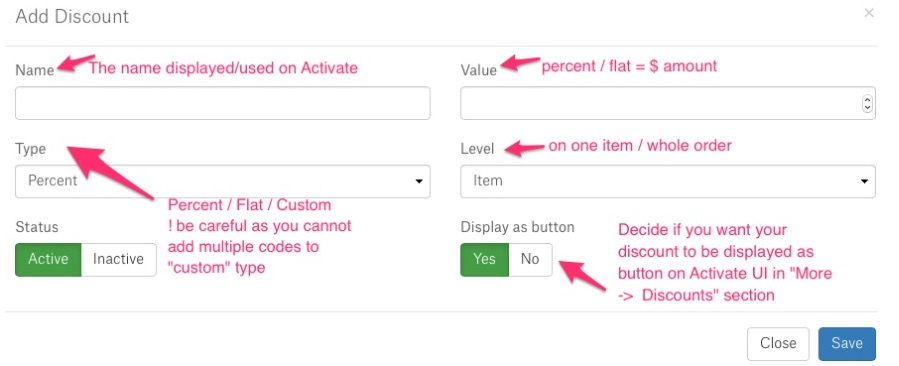
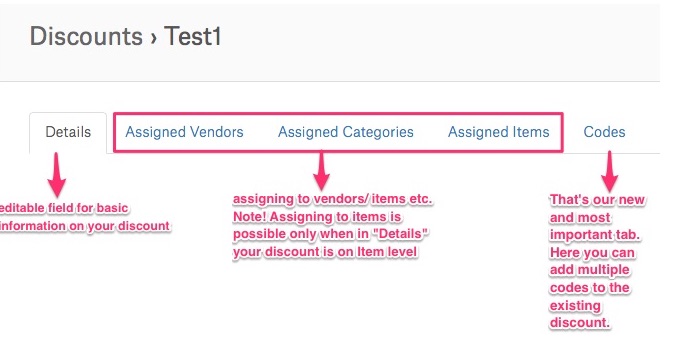
c) When your discount is created, you can explore more features in Connect > ‘Discounts’ main view. Click on a newly created discount and assign vendors, categories, or more items if needed.
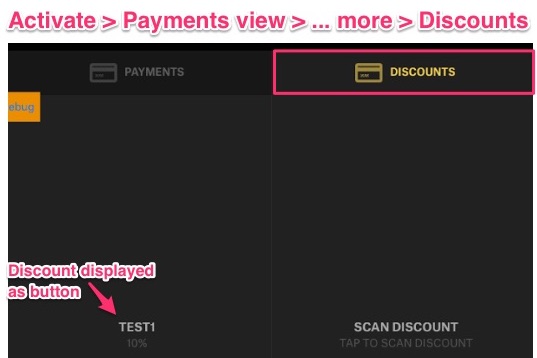
 Adding Codes to Discounts
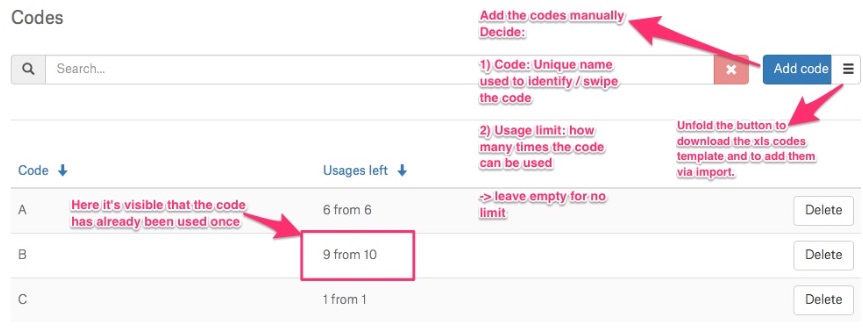
To add Codes, click “Codes” tab in Discounts section. The below screen shows the Test Discount (10%) that has 3 codes assigned.
 3. Blacklisting Credit Cards – our new option allowing to block a credit card that was declined during the checkout process. If the option is enabled, it will blacklist such CCs from being used for a given event. Have a look at the attached image if you want to blacklist CCs on Connect:
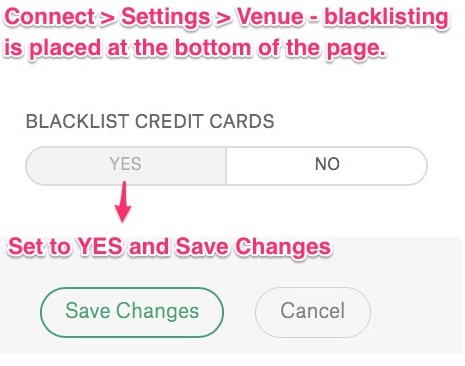
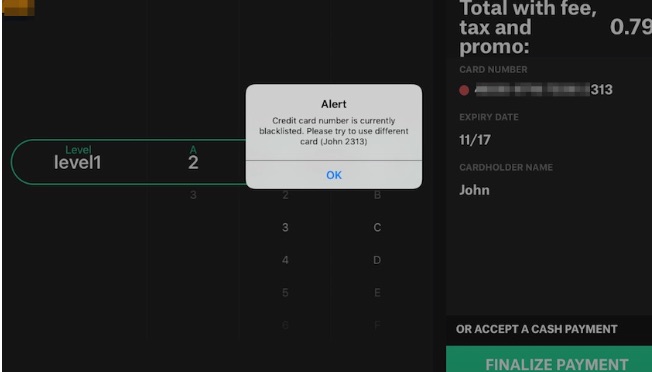
While processing checkout, the card data is read and checked using the last 4 digits and cardholder name. The information on Blacklisted CCs is taken from the database. If there has been a declined payment using the same CC (the app checks it automatically), the card is blocked from future use for 5 days and the below alert message is shown on Activate:
Changed
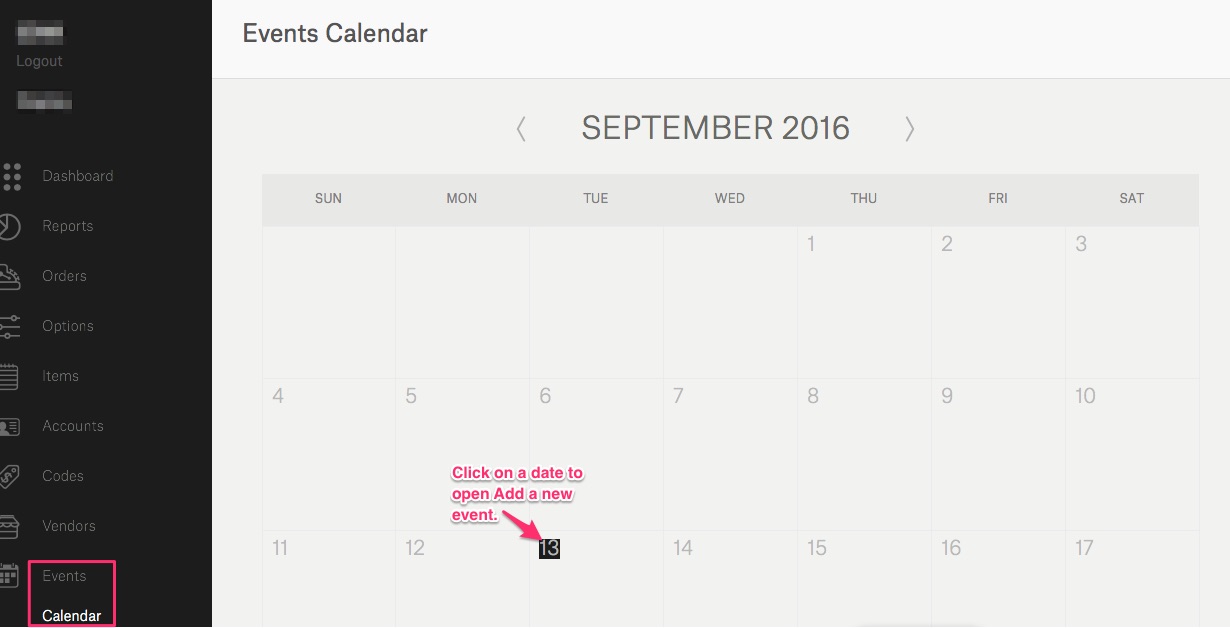
- Events tab on Connect has a new layout. You can browse through the calendar using the navigation arrows or just select a date (click on a date/number) and Event creation window pops up. Then, discover some new fields and follow with new event creation.
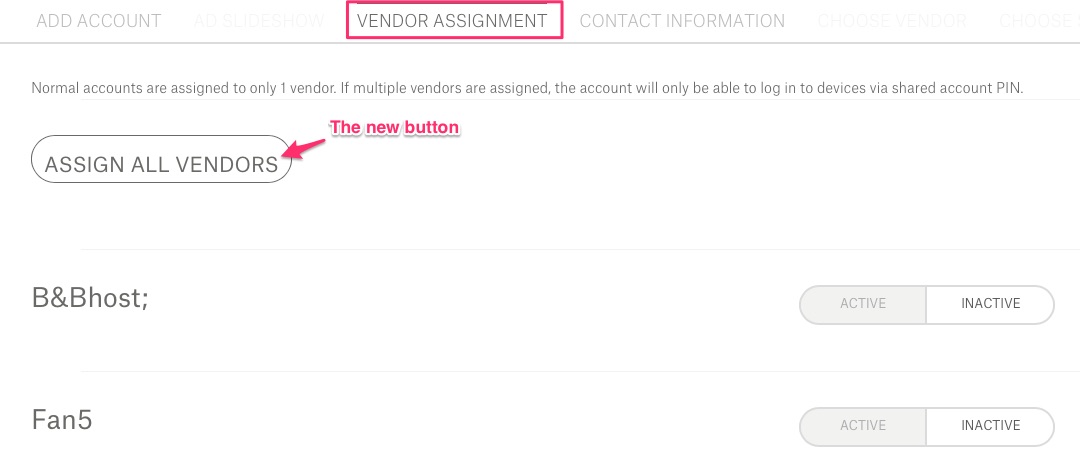
- When creating an employee account, it is possible to assign all Vendors (sub vendors are not included) to the account just in one click: Accounts>Add Account (or edit an existing one)> (type: Employee) > Vendor Assignment tab
- Orders page – payment type searching refreshed. Now, the search is more accurate and allows to filter individual payment types, such as, e.g., “split” or “stored value”.
- Sales Breakdown Report in Connect > Reports > Vendor > Sales Breakdown
 Vendor Group added. So if your Vendors have separate groups created, your final report can be narrowed down to a selected group only.
All Vendors in “Vendors” added so that users can run the report for the entire venue. Since running All Vendors involves digesting large data sets, the selected date range cannot be larger than 3 days. - A similar improvement in Reports > Inventory > Cost of Goods (COGS Report). From now on, the report can be run using vendor groups.

- The Category Recap Report available here: Connect > Reports > Inventory has been much improved. The report is for the Completed Inventory Events only. We’ve added some new features allowing to customize your reports. For more info, see the below steps.
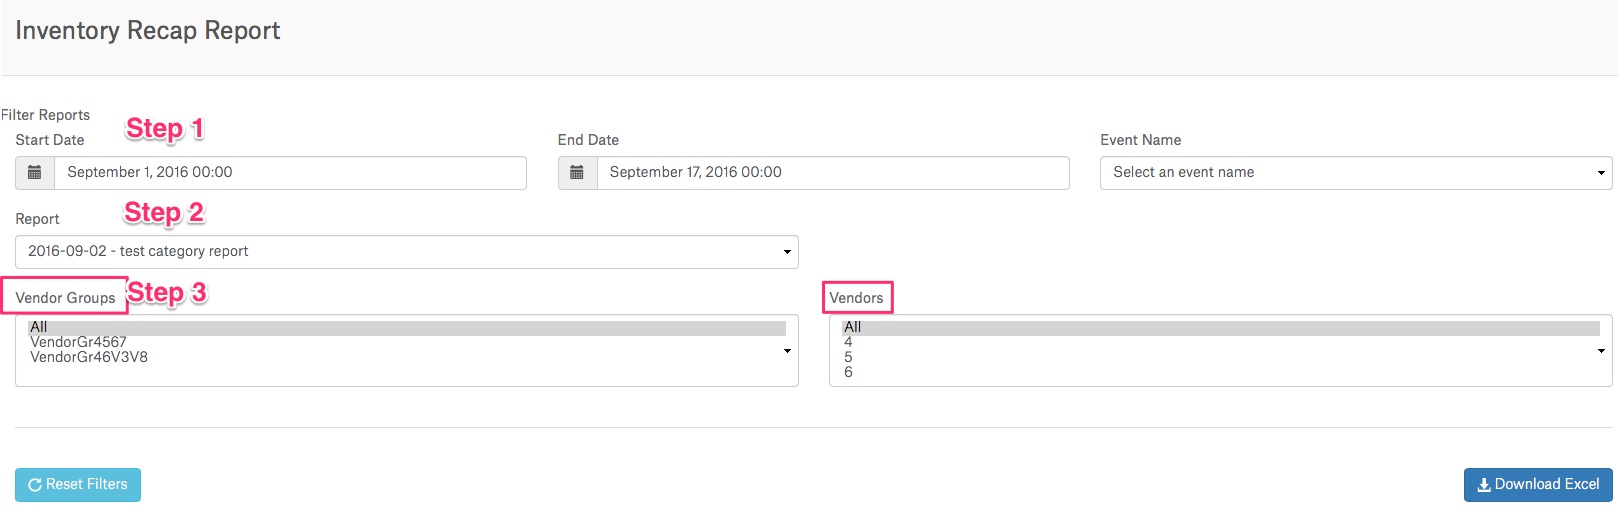
Step 1: Choose the start and end date that interests you and select an event.
Step 2: Select a report. The names of reports will appear, only when Inventory Event is completed. To do that, go to Inventory > Event > Stand Sheets and do the “cont out”.
Step 3: New possibility – to add vendor group and vendor filters supporting the chosen event. Thanks to this feature, not all vendors are required to be counted out or closed. It’s enough when the vendor responsible for the selected event is “completed” in Inventory Standsheets. So the Report Logic is like this:
-> Do not require all vendors in the venue to be counted out or closed
-> Run the report on any vendors that are completed
Example: on Standsheets page there’re two Vendors:
Status: Vendor1: Active, Vendor2: Completed
Category Report: only Vendor2 is visibleBelow the report, there’s a new flag added:
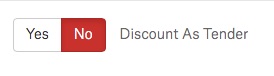
- By default, the flag is set to NO – in that case, when calculating the Total Tender column, discount is not subtracted
- If it is set to YES then the Discount column is added to Total Tender
- The COGS (Cost of Goods) button now shows all of the units calculated according to chosen unit and conversion in a slash format like , e.g., 18.00 CS / 0.50 EA / 0.50 EA. The button is dynamic and adjusts to the changes made using units dropdown list.

Fixed
- Printing receipts.
- Inventory Menu waiting time.
- Item refunds with discount.