New
- A new report called Discounts has been added. In terms of design and data, it looks and functions like other reports. The report will show only Completed orders (not pending ones).
The report can be found here: Connect > Reports > End of Show > Discounts.
The report (among other info) will include:
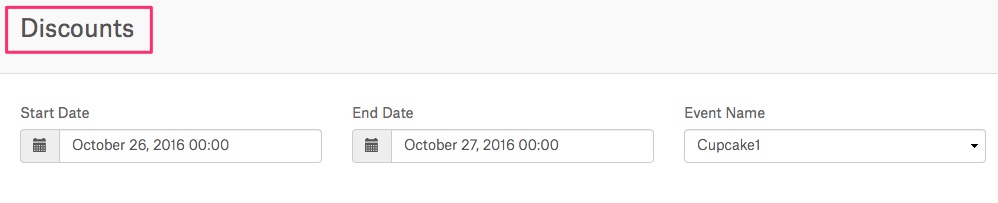
a) Total Discount Amount = the total financial amount, so, e.g., 20 discounts that make the total discount amount of $228
b) Discount Count ,e.g, 20 = the discount has been used 20 times. - Tax levels
 2.1 Editing Tax levels
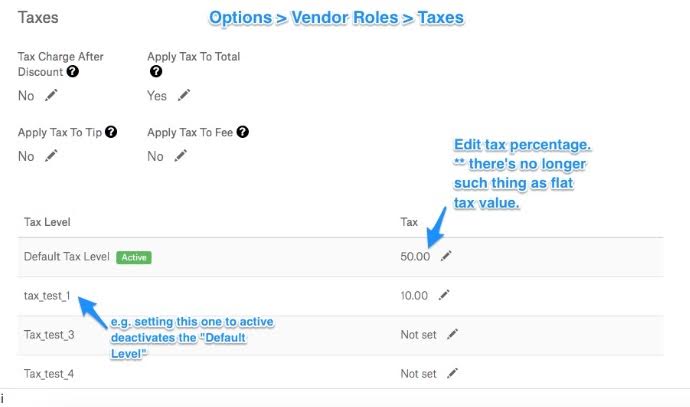
-> Tax levels can be set for the assigned Vendors. The default tax level is automatically used and created when we create a new Venue.
-> Only one tax level can be active. Tax level = always % (no flat tax).
-> The feature makes it easier to choose from the available levels and does not require assigning taxes to items separately.
-> Once a tax level has been created, it does not need to be deleted permanently. So, let’s say that for event XYZ you want to put 15% tax for VendorX. You create a tax level and set it as active. Then, a week later, you have another event and you want your tax to be 30%. So here’s what you can do:
1. You create a new tax level and click “Set Active”, or
2. edit the 15% tax.
Result
action 1: The old Level for VendorX (15%) is automatically deactivated once you set new tax active
action 2: The 15% tax level is still active but with a new percentage value.-> From now on, taxes are required, there’s “Default Tax Level” that is active by default. It is editable so that you can choose the desired tax value. It cannot be deleted, but setting another tax level to active or deactivates Default Tax Level. You can also put “0” next to Default Tax Level => as a result, 0% tax is put on all items.
Changed
- Vendor Roles Layout
Vendor Role has been changed, so now we have the sections much clearer and buttons are gathered in one location. What’s more, our Devs added some TOOLTIPS that make Connect buttons more human-readable.
1.1 General Tab has two new buttons:
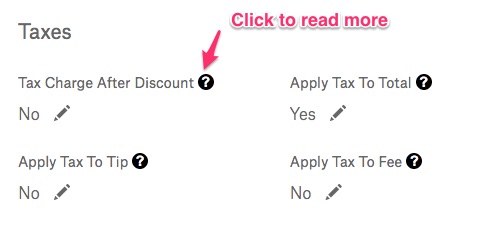
1.2 Taxes Tab – now this is the main place where Tax settings are put. At the same time, the change has affected employee role, as there’re no longer buttons with taxes stuff (apart from „Allow Tax Exempt”). Tax options have been reduced and apart from tax levels (described in NEW section), these 4 buttons show up:
1.3 Mobile Ordering Options tab:
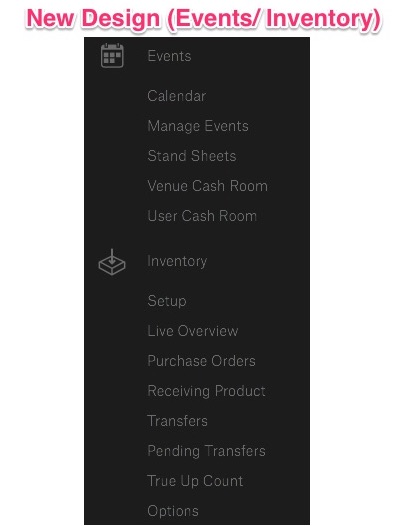
2. Inventory Event Configuration
- Calendar Event – linked to Inventory Events now
- Updated event structure: New Event (Inventory) – has been renamed as “Manage Events”and moved to Events section
- Stand Sheets page moved to EVENTS section
- Order Product section removed from Inventory section
- It is possible to edit Inventory Events
- Inventory Events status: Created, Opened, Closed, Cancelled
- Closing Venue Event – now it does not close automatically
- Calendar (Events) – one calendar for Events and Inventory Events
- When the Event’s status = CREATED, it cannot be Counted In (on Activate). Event needs to be in status = OPENED.
 3. New way of adding Inventory Events
Calendar Events are linked with Inventory Events.
Currently, Inventory Events are created in one place: Connect > Events > Calendar. To be able to create Inventory Event follow the below steps:a) Connect > Events > Calendar
b) click precisely the date number (this will be the date of your event/event start)
c) Add Event tab opens up, fill in the necessary fields
d) scroll to the bottom of the page till you see the below viewExample: My inventory event is created in Calendar Once your Inventory Event is added, go to Manage Events to see the available Event actions. My Inventory Event “Cupcake” has status Created.
Fixed:
- Cash Room Report calculation.
- Adding distributors to an item via Inventory import.
- Category Recap Report defining the end date correctly.
- Updating sold out status from KDS -> Activate.
- Time display in All Orders