New
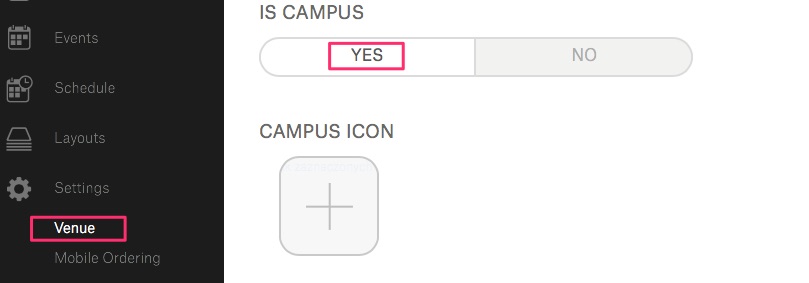
- Campus Venue tabs added. It’s just a new feature that enables students making orders from their Campus location. On Connect it can be set in the following way: Go to: Main Menu>Settings>Venue>Is Campus – yes> Campus Icon field shows up. (only when your venue is Campus)
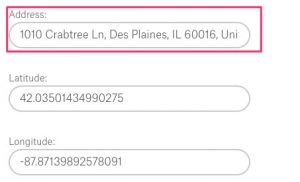
 Restaurant Location settings updated. Restaurant’s exact location can be set to make pickup orders easier for clients. Go to: Connect>Vendor>Choose Vendor>Vendor Settings>Restaurant.
- Drag&Drop the red pin at a desired spot. Latitude & Longitude are set automatically.
- Type in address manually.
 Yelp ID
Add Yelp ID to any Vendor that is Campus. Restaurants with assigned Yelp ID are updated with info on: popularity, rating, votes etc. Type restaurant Yelp ID in the space provided. Restaurant’s Name and Rating is filled in automatically.
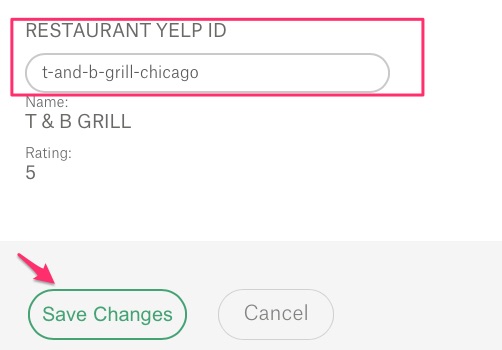
Hint: Restaurant Yelp ID is found in the address bar after http://www.yelp.com/biz/. For example, the ID in this URL is “t-and-b-grill-chicago” for http://www.yelp.com/biz/t-and-b-grill-chicago
What’s more, Venue marked as Campus has additional tab “Open Hours”.
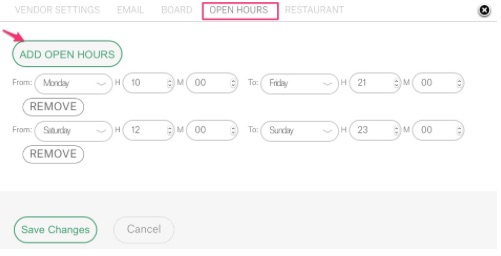
In this section you can manage sales point opening hours. By default, the section is set from Monday to Sunday. Hours and minutes are adjusted manually. If your Vendor is opened, e.g., from Saturday – Sunday a bit longer click: Add Hours to add a new row.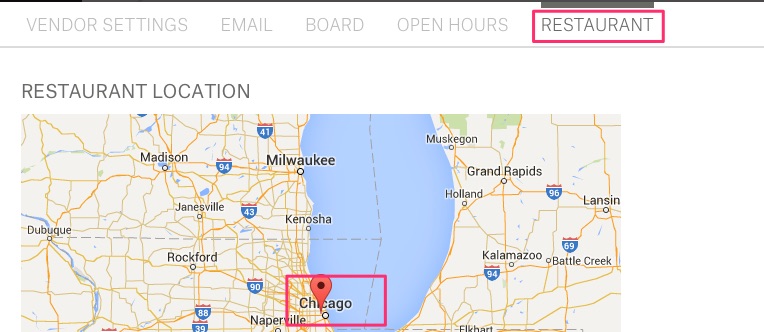 How to set it? There’re 2 ways:
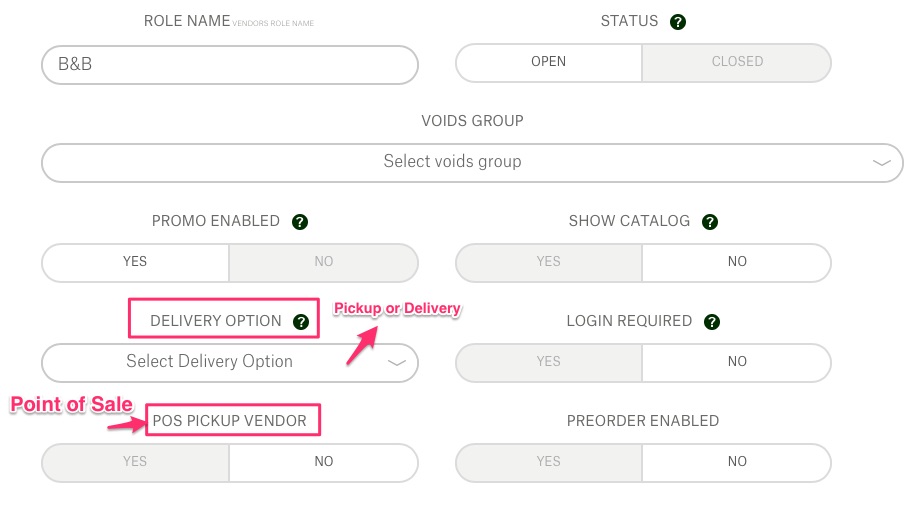
 - New buttons assigned to Vendor Roles. Go to Connect>Main Menu>Options>Vendor Roles>choose a Vendor>tab “General” – Delivery Option and POS Pickup Vendor are added. Delivery Option – just decide whether your Vendor is a Pickup point or a Delivery guy. POS Pickup Vendor – marked “YES” means that your Vendor allows pickup and runs its own POS – Point of Sale.
- Wristband integration for Stark RFID and Eventbrite. Stark RFID and Eventrbrite are just brand new payment platforms.
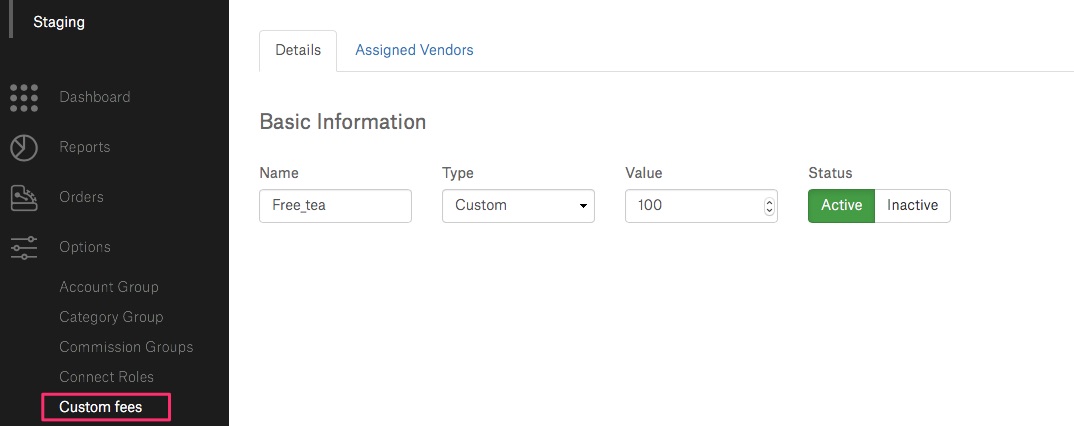
- Custom fee added to Connect main menu. To reach it go to: Connect>Options>Custom fees. Fill in all of the required fields (tab details) and assign a vendor (or vendors) where selected fee will be used.
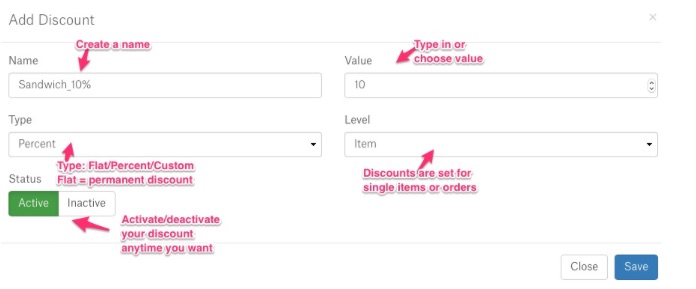
5. Custom Discounts feature added. After normal process of creating a discount, this allows you to assign a given discount to a chosen: vendor, category or item. To reach it go to: Options>Discounts. Below a sample screen illustrating how to add a regular discount.
6. Items creation. Now, there’s no need to set item to “Active” as it is activated by default. All the required fields (such as, e.g., taxes) must be completed. Otherwise, item status cannot be set to Active.

7. Venue has new possible setting – require tax for item (value can be set to yes/no). NO is set by default.
8. Price Levels handling. Now it’s easier than ever with price settings from Connect side. Changing price levels of POS items triggers the change on inventory items. So when users set a price level on POS side, it automatically updates the pos_price in the inventory table on Connect to match.
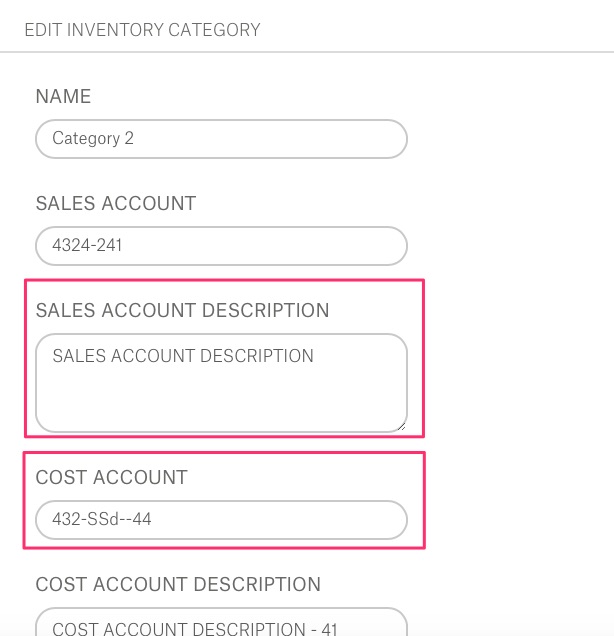
9. Inventory Categories view updated. To reach it go to: Inventory>Categories>choose or add a category> Specific account codes can be added under “Sales Account Description” and “Cost Account”. The two fields indicated below are text fields, and should be filled in with codes up to 20 characters.
10. Update wait time changed. Basically, a client orders pizza using SDK, restaurant receives the order and using KDS responds with expected wait time (e.g. 15 min). But… the restaurant hits problems as there’s no cheese left. While somebody from staff is rushing to find some cheese, wait time on KDS is updated to 45 min. Simultaneously, client’s SDK wait time view is being refreshed. Users can change the wait time in two ways: from Connect or KDS.
Connect:
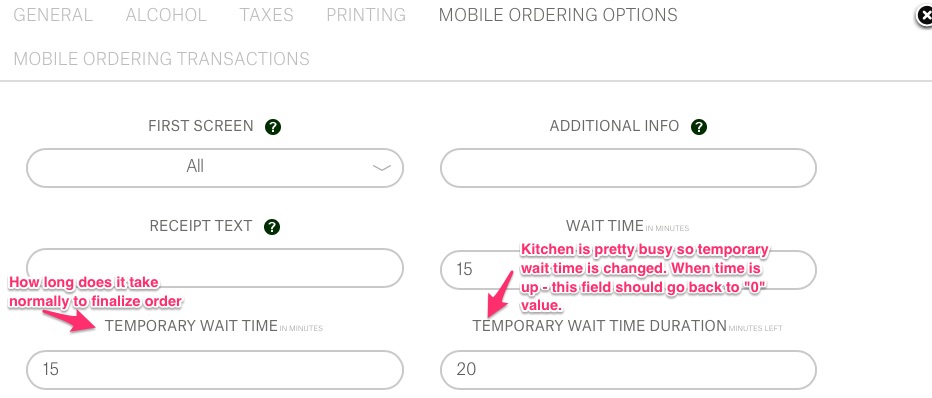
Options> Vendor Roles> Choose Vendor > Mobile Ordering Options >Temporary Wait Time / Temporary Wait Time Duration. It is possible to set only temporary wait time or temporary wait time duration. It triggers the change in KDS and SDK.
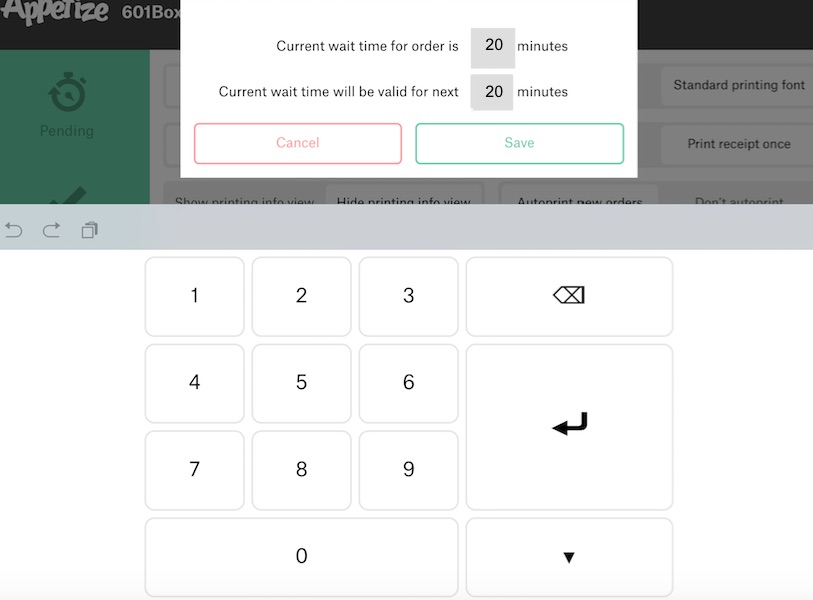
KDS: section “Settings” > Manage Wait Time button > a popup with time manager shows up. New timing can be also set here:
11. Price Levels for Inventory Items view and workflow improvement. (Main Menu>Inventory>Setup) Enables to change inventory items price once for the whole venue just by one click. Adding new price level on inventory items makes it possible to define new prices.
How to set it?
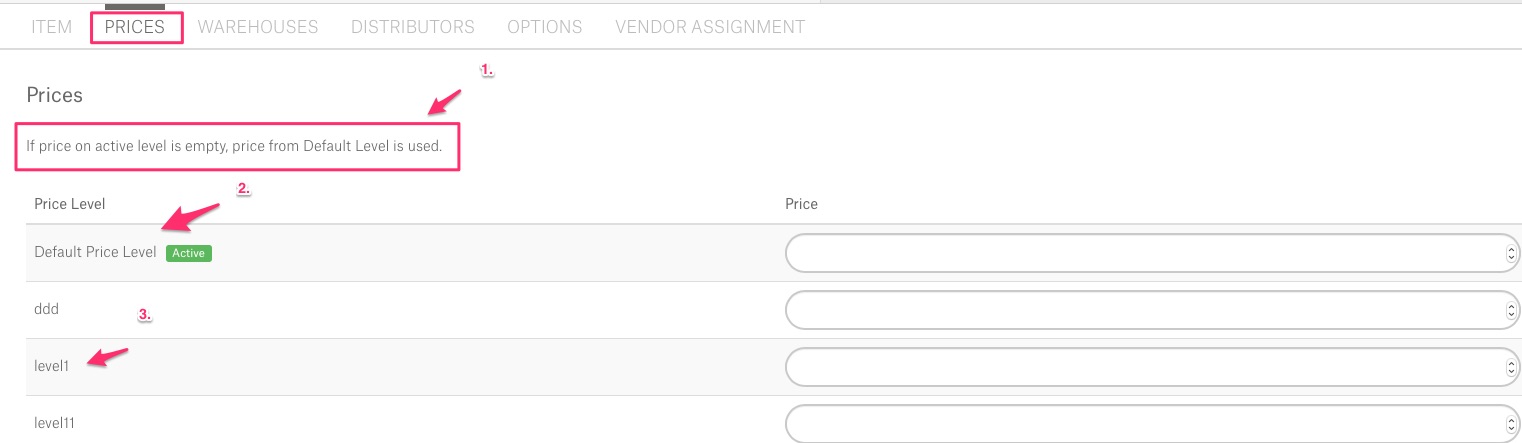 One way is when you create a new inventory item: Main Menu>Inventory>Setup>Add Inventory Item> open “PRICES” tab>
- Level 1 – it’s one of newly created levels to choose from
- Default Price Level. So in this case, no level for inventory item was chosen. That’s why it is marked as Active.
- Warning – If price on activate level is left empty, price from Default Level is used.
- Only one price level can be set to active.
- Removing price level will remove price levels from inventory items.
- Removing active price level will change active price level into default level.
Changed
- Permissions in Connect roles put in alphabetical order.
- Custom Refund and Item Refund options are no longer available for Givex split payments.
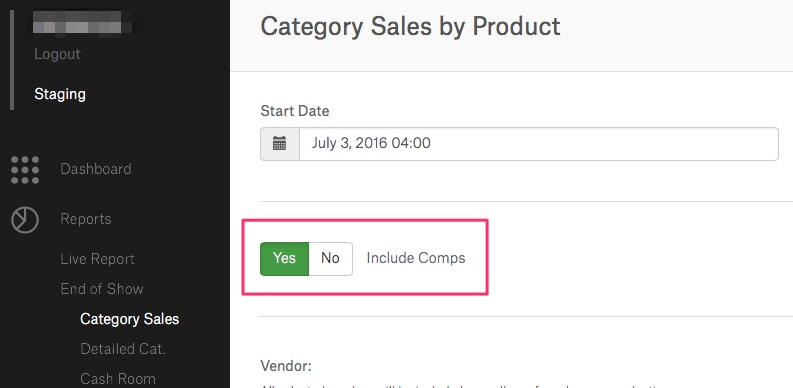
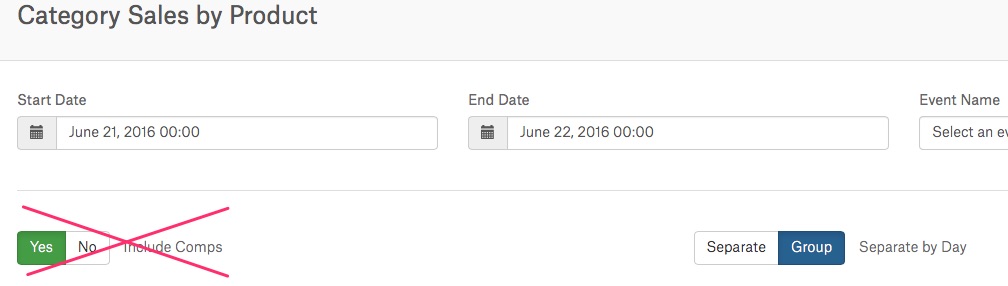
- Go to: Reports> Category Sales and Detailed Cat. “Include Comps” button recreated.
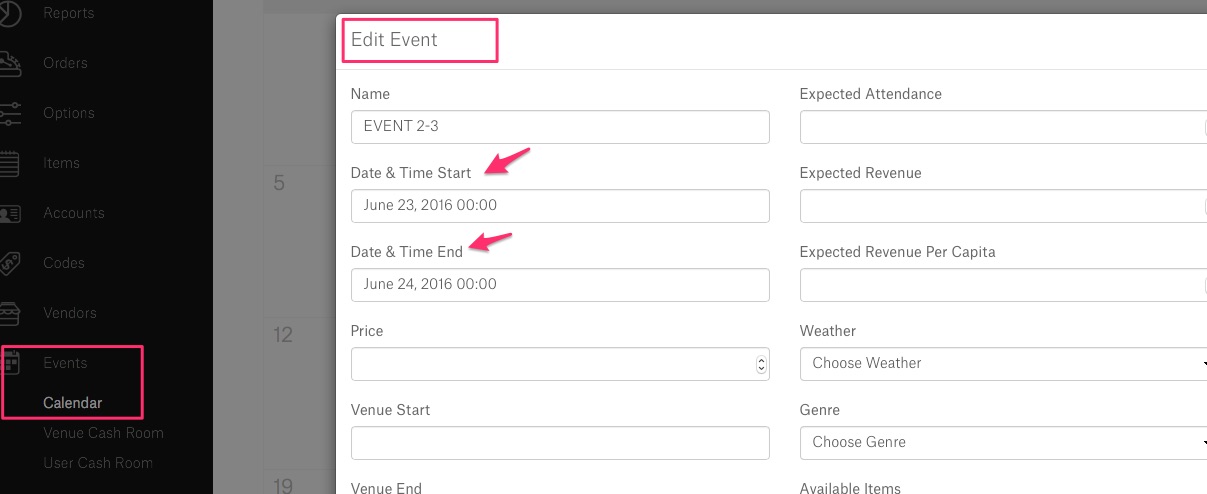
- Event – Editable start and end time: Connect>Main Menu> Events> Calendar> Edit Event tab appears> select start and end time for events.
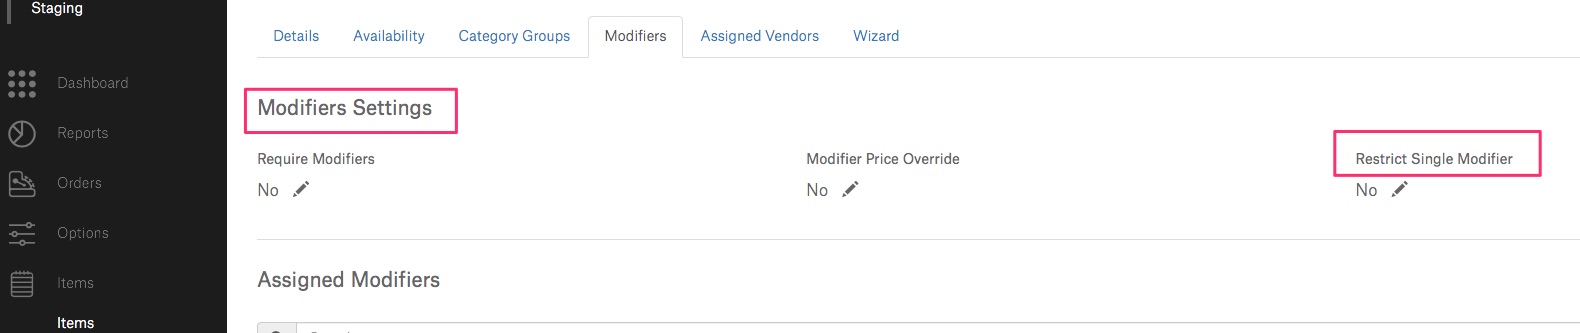
- It is not possible to enable Wizard if “restrict single modifier” option is enabled. Similarly – If wizard is enabled, it is not possible to enable option “restrict single modifier”.
- Visibility and division of discounts on PDF receipt.
- Sorting of items: (now they’re grouped by category and then alphabetically within the category both on Connect and PDF).
- Custom Discounts – assigning discounts by Category (previously also assigning by Type, but not functional for users).
- Closed Vendors removed from PDF Standsheet reports.
- Transfers – Connect>Inventory>Transfers. Users will have the ability to select a date range from calendar and plan a transfer with its inventory and all the items from the past or from an event planned for the future. The feature allows to edit the transfer items.
- A slight improvement in Transfer Summary report. There’s a new filter that allows to choose a report based on its current status. To reach it go to: Reports>Inventory>Transfer Summary Report.
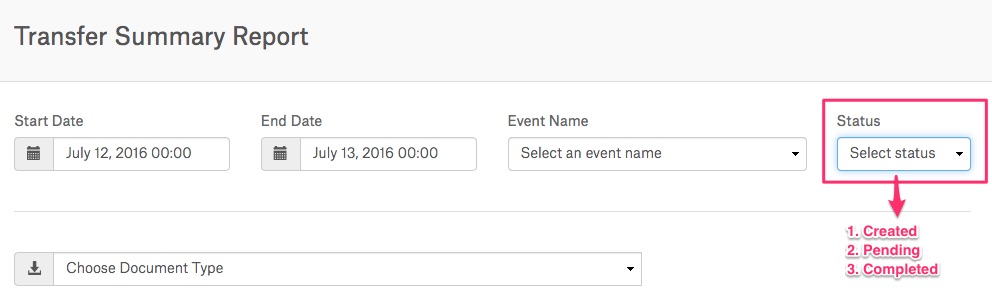 There are three Transfer status values: Created (transfer has been created and saved but no actions have been taken) , Pending (transfer ready to be actioned) , Completed (transfer confirmed, inventory is moved to the destination location).
 - The length of codes typed in while importing Parking Pass Codes increased to 50 characters.
- Full history of fees&orders became available.
Fixed
- Duplicated orders issue solved.
- Items&Price visibility in Detailed Category and Category Sales reports.
- Standsheet report edition options.
- Frontgate editing features refreshed.
- Incorrect data showing up on some reports.
- Counting inventory items button.
- PIN validation for Subvendors.
- Improvements in KDS/Connect server response time